The Story Behind My Favorite Dal Makhani Recipe
I first discovered dal makhani during a casual attempt to recreate a dish I’d enjoyed at a tiny neighborhood Indian spot. The creaminess and depth of spices took me by surprise—how could simple lentils and beans come together into something so rich and comforting? It quickly became clear this wasn’t just any comfort food; it had a mellow, hearty quality that made it a go-to in many homes, including mine. Learning to make this dish from scratch changed the way I looked at pantry basics—it’s a satisfying, nourishing meal that never feels too heavy.
In this guide, I’m sharing the best dal makhani recipe based on a lot of trial, error, and real kitchen time. Whether you’re curious about Indian cooking, want to mix up your usual meals, or just want a solid lentil recipe that delivers, you’re in the right place. I’ll break down the ingredients, walk you through the steps, and offer tips that’ll help you cook dal makhani like a pro—without the guesswork.
Why Dal Makhani Stands Out
Dal makhani has a special spot in Indian cooking, especially in Punjabi households where it's been loved for generations. What caught my attention right away was how a simple mix of whole black urad dal and kidney beans could create such a rich, comforting dish. I’ve seen it served mostly during festivals or special occasions, which tells you just how much it means culturally and emotionally to the people here.
Beyond the taste, dal makhani is surprisingly nutritious. It delivers a solid dose of protein, fiber, and iron — all important, especially if you follow a vegetarian diet like I do. Over the years, I’ve tried plenty of plant-based dishes, but dal makhani stands out as both filling and wholesome. Plus, making it at home means you can tweak the fat, salt, and spice levels exactly how you like — way better than the heaviness you often find in restaurant versions.
After trying out countless Indian restaurants and testing recipes in my own kitchen, I finally nailed a version of dal makhani that strikes the right chord—creamy and satisfying without feeling like a guilt trip. It’s rich enough to feel like a treat but still light enough to fit into a healthy meal plan. This balance keeps me coming back to it time and again when I’m craving something comforting.
What You’ll Need
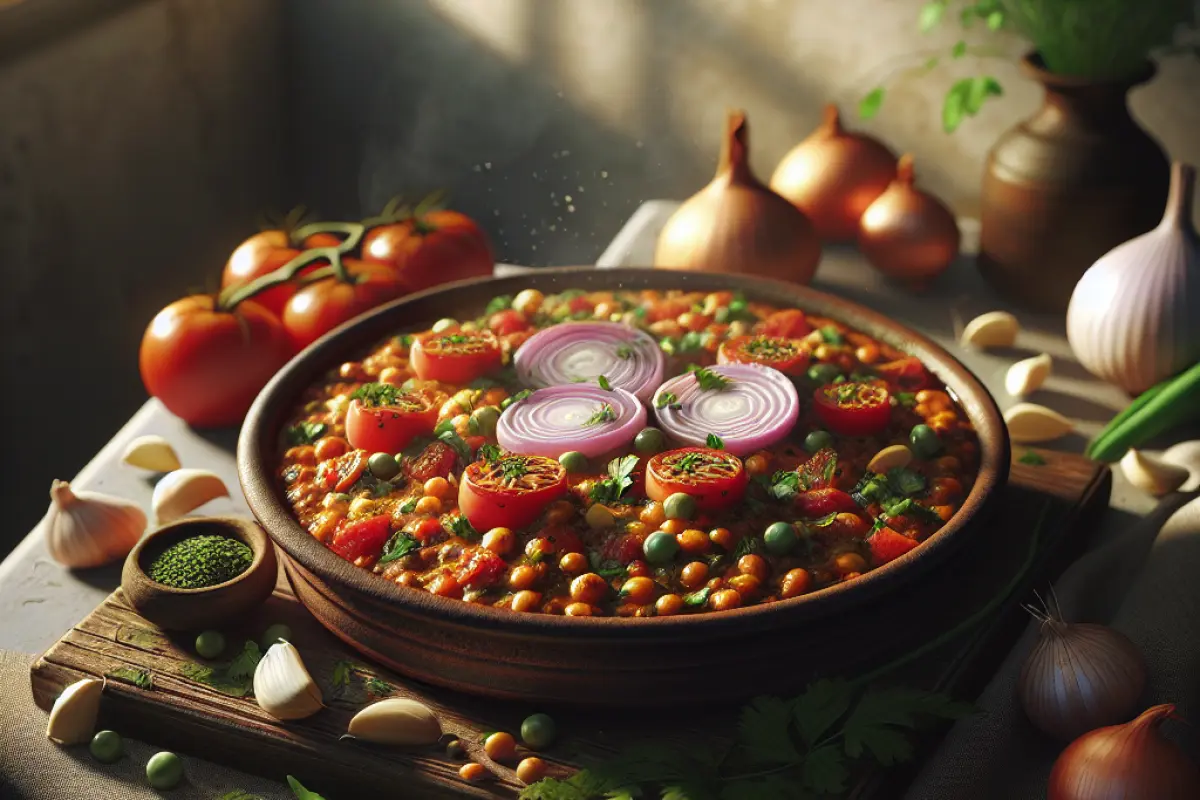
To get that perfect, authentic dal makhani—thick, creamy, and full of flavor—you’ll want to gather these ingredients:
- 1 cup whole black urad dal (split black gram)
- ¼ cup rajma (red kidney beans)
- 3 cups water (for pressure cooking)
- 2 medium onions, finely chopped
- 2 large tomatoes, pureed (about 1 cup tomato puree)
- 3-4 cloves garlic, minced
- 1-inch piece ginger, grated
- 1-2 green chilies, finely chopped (adjust to taste)
- 2 tablespoons unsalted butter (I prefer Kerrygold or local organic if possible)
- ¼ cup fresh cream (or substitute with ¼ cup coconut cream for a dairy-free option)
- 1 teaspoon cumin seeds
- 1 teaspoon garam masala
- ½ teaspoon turmeric powder
- 1 teaspoon red chili powder (adjust to preference)
- 1 teaspoon coriander powder
- Salt to taste
- Fresh cilantro for garnish (optional)
I picked up my lentils from a local organic market, where a 500g bag of urad dal goes for about ₹70, and kidney beans cost around ₹80 for the same amount. These markets are great because you don’t have to spend a lot to get good-quality lentils. Plus, I’ve noticed that the fresher lentils from here cook up better and have a nicer texture compared to the older, pre-packaged ones sitting on supermarket shelves.
When it comes to spices, I’d say it’s worth spending around ₹200 on good-quality garam masala, cumin, and coriander powders since they really make the dish come alive. Adding fresh ginger and garlic brings a nice zing, while a dollop of butter and cream gives that luxurious richness that’s hard to beat.
If you want to keep things lighter, you can swap out the heavy cream for low-fat or plant-based alternatives like soy cream. Just keep in mind, that switch changes the texture quite a bit—so don’t expect quite the same creamy finish as the original.
How to Cook It Step by Step
Preparation
Begin by giving 1 cup of urad dal and ¼ cup of rajma a good rinse under cold water until it runs clear. Then, soak them in plenty of water for at least 8 hours, or better yet, overnight. This soaking softens the lentils and cuts down on cooking time a lot—skip it, and you might end up with some parts undercooked and a longer wait in the pressure cooker.
While the lentils are soaking, get started on the tomato puree. Drop 2 large tomatoes into boiling water for about 2 minutes, then peel off the skins and blend them until smooth. Fresh puree like this really lifts the dish and keeps it from getting that canned-tomato taste.
Start by grinding the garlic and ginger into a smooth, fragrant paste—about two tablespoons should do. This little blend is where the magic begins, adding that deep, layered flavor right from the start.
Cooking Process
After soaking, drain the lentils and beans well. Toss them into your pressure cooker with three cups of water and a teaspoon of salt. Cook on medium heat for about 20 to 25 minutes, until the dal is soft but still holds its shape. I’ve tried slow cooking on the stove, but the pressure cooker cuts the time drastically—plus, it saves energy, which is a win when you’re juggling a busy day.
While the dal’s bubbling away, melt two tablespoons of butter in a heavy pan or Dutch oven over medium heat. Toss in some cumin seeds—they should start sizzling right away, filling the air with their nutty aroma. Add finely chopped onions and cook them low and slow, stirring occasionally, until they turn translucent and golden brown—usually around 8 to 10 minutes. Trust me, rushing this part won’t get you the same rich, caramelized flavor. Patience pays off here.
Toss in the ginger-garlic paste and green chilies, letting them sizzle for about 2-3 minutes until the kitchen fills with that warm, spicy aroma. Next, pour in your tomato puree along with half a teaspoon of turmeric, a full teaspoon of red chili powder, and another teaspoon of coriander powder. Turn the heat down low and let the masala cook gently for about 10 minutes, stirring now and then. You’ll know you’re on the right track when the oil starts to separate from the tomato mixture—it's a little sign that the flavors are really coming together.
When the pressure-cooked dal is done, add it straight into the tomato and onion mix, including any leftover cooking liquid. Give everything a good stir, lower the heat, and let it simmer slowly for 45 minutes to an hour. Make sure to stir every 10 to 15 minutes so nothing sticks to the bottom. This slow simmering is where the magic happens—where all the flavors blend and deepen into something rich and comforting.
About 10 minutes before you're ready to serve, stir in a quarter cup of fresh cream and a tablespoon of butter. Sprinkle in a teaspoon of garam masala, then taste and tweak the salt and chili to your liking. Adding the cream and butter too early can make things feel greasy, so it’s best to hold off until the very end to get that smooth, luscious finish.
One thing I quickly learned was that keeping the simmer low is crucial—you don’t want a full-on boil, just a gentle bubble here and there. Getting the texture right took me a few tries; the dal shouldn’t be too thick or watery but nice and creamy, like the perfect comfort food.
Tips for Perfect Dal and Beans
Soaking dal and beans is a must. I usually aim for about eight hours, but I tested soaking times between six and ten hours. Anything less than six made the dal, especially rajma, tougher than I liked. Plus, soaking helps soften the beans, which cut down my cooking time by almost half—a total win when you’re hungry!
Letting dal makhani simmer slowly is where the magic happens. While plenty of folks jump straight into eating it right after the pressure cooker’s done, I like to turn the heat way down and let it cook gently for about 45 minutes. It’s the closest I’ve come to that authentic slow-fire flavor you get in Punjab. Now, if you’re pressed for time, just keep stirring often and use a heavy-bottomed pan so nothing sticks or burns.
When it comes to tempering the spices, butter or ghee isn’t optional—it makes all the difference. I once tried using plain oil, thinking it’d work fine, but it just felt flat and missing something. Butter carries all those aromas and adds a richness that really brings the spices to life. Adding cream and butter towards the end keeps the dish smooth and silky without that greasy or heavy finish.
Pressure cooker or stovetop? I’ve done both, and honestly, the pressure cooker wins for convenience. Once, I simmered dal on the stove for nearly two and a half hours. It was a pretty long haul and needed constant attention, which isn’t always practical. My 5-liter pressure cooker gets a whole batch done quickly and evenly, so it’s my go-to whenever I’m making dal makhani at home.
When I’m balancing spices, I like to start off on the mild side and then adjust as the dal simmers slowly. I find tasting it every 15 minutes really helps dial in the salt and chili just right. And don’t skip the garam masala at the very end—it adds a cozy warmth that brings everything together beautifully.
Mix It Up: Variations and Substitutions
Want to change up the texture? Using just rajma beans makes the dal makhani chunkier, while sticking to only whole urad dal gives you a silky, creamier dish. If you blend both, you get a balanced, smooth consistency that’s neither too thick nor too grainy—a nice middle ground.
When I want a lighter twist, I swap out cream for about ¼ cup of coconut milk or homemade cashew cream. They give the dish a nice, silky texture without the dairy, though the flavor shifts a bit. If you’re using coconut milk, you might want to ease up on the chili powder since the natural sweetness of coconut can soften the heat.
I’ve found that smoked paprika or dried fenugreek leaves (kasuri methi) can really elevate the flavors. Tossing in a teaspoon of kasuri methi right at the end adds this subtle smoky aroma that lifts the whole dish without making it complicated. Smoked paprika is great too, especially if you like your food with a hint of smoky depth.
For those sticking to a vegan diet, swapping butter with 2 tablespoons of coconut oil or vegan margarine works well. The flavor shifts a bit, but it keeps the dish rich and satisfying. Just remember to bump up the salt a little since butter naturally adds some saltiness that you’ll miss here.
You can easily adjust how spicy you want the dish to be. If you like it mild, start with just half a teaspoon of chili powder. But if you’re after some heat, feel free to add up to two teaspoons. Everyone’s taste buds are different, so I always say start small—you can always add more as you go.
Best Ways to Serve and Pair
Dal makhani really shines when paired with simple, classic sides. I usually reach for freshly steamed basmati rice or jeera rice with a hint of cumin—it soaks up the creamy sauce perfectly and helps balance out the richness. Trust me, that combo is hard to beat.
Soft, warm naan breads are the perfect match here. You’ll find packaged naan at local shops for around ₹50-₹80 a pack, but if you have a bit of time, whipping up homemade naan is surprisingly easy and adds a special touch to your meal.
To balance the rich, creamy dal makhani, I like to serve a simple cucumber and tomato salad or a quick homemade raita made with plain yogurt and a sprinkle of cumin powder. They bring a fresh, cool contrast that keeps the meal from feeling too heavy.
Dal makhani is great for anything from a family dinner to a casual weeknight meal when you want something comforting but not fussy. I once made it for a small dinner party with just a couple of sides, and everyone left happy without needing a whole spread.
To keep things simple yet appealing, I like to sprinkle some fresh chopped cilantro on top and add a little swirl of cream or melted butter right before serving. It makes the dish look inviting and adds that warm, homemade touch.
Mistakes You’ll Want to Skip
A big rookie error is not soaking your lentils and beans long enough. I learned that lesson the hard way when my first batch ended up with beans that stayed rock hard, no matter how long I cooked them—definitely not the relaxing dinner I was hoping for.
If you rush through the simmering phase, your dal ends up lacking depth. You might wonder, “Why bother taking so long?” Well, that slow simmer allows the spices to fully blend with the lentils, creating a richer, more balanced taste. Skip it, and the dal can come out tasting pretty one-dimensional.
Adding cream too early is a common mistake—it can curdle or separate, leaving an oily film on top and messing up the texture. The best move? Save the cream and butter for the very end, just before serving.
Another rookie error is seasoning the dal too soon and then not tasting it as it cooks. It’s tempting to throw in all your salt and spices at the start, but as it simmers, the flavors intensify. I always season little by little, tasting along the way to get it just right.
Skipping the spice tempering step really dulls the flavor of the dal. When you toast spices in hot butter or ghee, their essential oils wake up, creating those deep, rich notes you'd miss if you just tossed raw spices straight into the pot.
Tips for Storing and Reheating
Dal makhani keeps surprisingly well. I usually store leftovers in an airtight container in the fridge for up to four days. When reheating, I turn the heat down low to stop it from drying out, and sometimes add a splash of water to keep it nice and saucy.
You can freeze dal makhani easily by dividing it into freezer-safe containers. It keeps well for up to a month. When you’re ready to enjoy it again, just let it thaw overnight in the fridge, then warm it up slowly on the stove, giving it a gentle stir to bring back that creamy texture.
Cooking a big batch of dal makhani saves a ton of time later. One day you can serve it with fluffy basmati rice, the next with warm naan, or even roll it into wraps for a quick lunch. Plus, the flavors actually get better after it sits in the fridge for a day, making meal prep a real winner.
Dietary Tips and Adjustments
This dish is naturally gluten-free—as long as you pair it with gluten-free sides, of course. I usually go for brown basmati rice or gluten-free roti when I’m avoiding gluten, and it works perfectly every time.
If you’re steering clear of dairy or follow a vegan diet, just swap out the butter for coconut oil or your favorite vegan butter. For the cream, coconut cream or cashew cream do the trick without sacrificing the richness.
Looking to lighten things up? Try cutting the butter down to just a tablespoon and either use low-fat cream or cut the cream back to two tablespoons. I’ve noticed that adding a pinch more spice helps keep the flavor punchy, so it never feels like you’re missing out.
Dal makhani can sneak up on you with its salt content if you're not careful, so I always cut back on the added salt and let the herbs and spices do the heavy lifting for flavor. It’s a small change that makes a big difference, especially if you’re keeping an eye on your heart health or blood pressure.
FAQs
Can you make dal makhani in a slow cooker? Absolutely! Just soak your lentils and beans beforehand, then pop everything into the slow cooker on low for 6 to 8 hours. It’s a longer process than the stovetop, but the flavors develop beautifully, almost like the old-school method.
Wondering how long dal makhani lasts in the fridge? It usually keeps well for about 4 days in an airtight container. When reheating, I recommend warming it up slowly and giving it a good stir to keep the texture creamy and delicious.
If your dal makhani tastes a bit flat, don’t worry! Give your spices and salt a quick taste first. Sometimes, all it needs is a little kick—try stirring in a pinch of garam masala or some extra chili powder to add warmth and a touch of heat. A squeeze of fresh lemon juice can also work wonders to brighten everything up and bring the flavors to life.
Wondering if dal makhani fits into a weight loss plan? It really can, but with a few tweaks. Cutting back on the butter and cream makes a big difference. The lentils and beans are great for keeping you full thanks to their protein and fiber, but watch out—they can get heavy in calories when loaded with fats. So, a lighter version keeps the goodness without the extra baggage.
Thinking about skipping the soaking and using canned beans instead? You can, but the taste and texture won’t quite match up. Dry lentils and rajma soak up flavors and cook in a way that’s hard to replicate with canned beans. If you go canned, rinse them well to get rid of any extra salt or preservatives, and remember to tweak your cooking times so they don’t turn mushy.
To get your dal makhani thicker and creamier, just let it simmer gently on low heat for a bit longer so the liquid reduces naturally. If you want it richer, add a splash more cream and a knob of butter—but don’t go overboard, or it can quickly become too heavy and greasy.
Trying to speed up cooking without losing flavor? A pressure cooker is a game changer. Also, soaking your lentils and beans overnight shaves off tons of time. When simmering, you can nudge up the flame slightly, but keep a close eye so nothing sticks or burns.
Conclusion
Dal makhani is one of those recipes that feels worth every minute you spend on it. The ingredients are straightforward, but with a little patience and the right technique, it comes together beautifully—rich, comforting, and nutritious. Plus, it’s flexible—don’t hesitate to swap in different creams or adjust the spices to match your taste perfectly.
If you’re someone who prefers straightforward, tried-and-true recipes over all the fuss, this guide’s made for you. Give it a shot, tweak it to fit your taste, and most importantly, enjoy the process. And hey, don’t hesitate to share how your dal makhani turns out or any hiccups you ran into—I’m genuinely curious!
Looking for more filling vegetarian meals that pack both flavor and nutrition? Take a peek at my post on “Simple Rajma Masala for Weeknight Dinners.” And if lentils are your thing, you might want to try “Easy Tadka Dal with Indian Spices” next—it’s a real keeper.
Hit subscribe for more down-to-earth, healthy recipes, and follow along if you want cooking ideas that come from real kitchen experiments. Wishing you happy, stress-free cooking!
If this topic interests you, you may also find this useful: https://www.cravediary.com/blog/best-protein-smoothie-recipe-for-a-healthy-energy-boost