Getting Started with the Best Dal Makhani Recipe
I’ll never forget the first time I had dal makhani at a tiny Punjabi joint on a cold evening. The moment that rich, creamy dish arrived, the whole place seemed to fill with a warm, smoky aroma that just wrapped around you. Since then, I’ve cooked dal makhani more times than I can count, experimenting to get the perfect balance between creamy texture and that subtle smoky flavor that makes it special. If thick lentils have ever intimidated you or if you thought authentic dal makhani was only something you get at a restaurant, trust me—you can make it at home. This recipe comes from lots of hands-on testing and real kitchen trials, so you can enjoy a genuine, comforting dal makhani without any fuss.
Why This Dal Makhani Recipe Stands Out
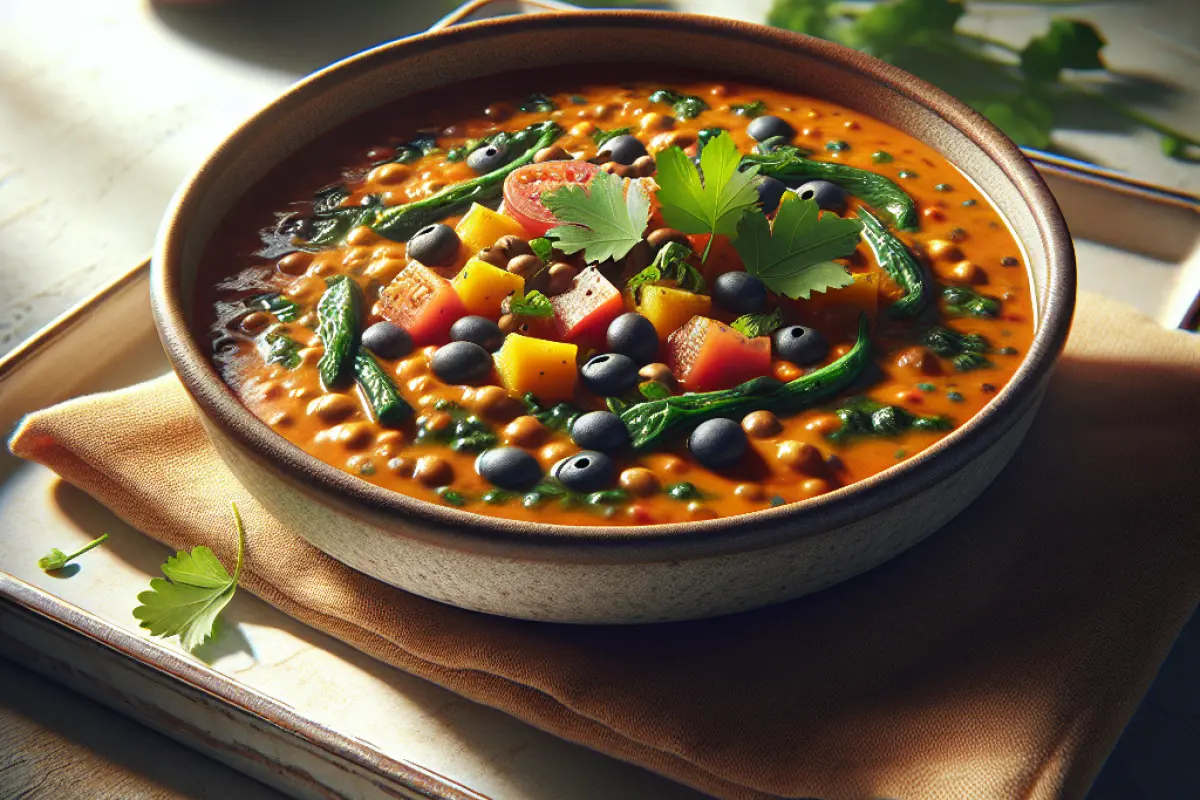
Dal makhani isn’t just any lentil dish—it’s a beloved staple in North Indian kitchens, especially for special occasions or cozy weekend dinners with family. Over the years, I’ve realized it’s the combination of whole black urad dal and kidney beans, simmered slowly with butter, cream, and a careful mix of spices, that gives it that irresistible richness. What really sets it apart is the creamy, velvety texture paired with a subtle smoky hint—something you often get from cooking it over a wood fire or adding a touch of charcoal during tempering. After tasting this dish at various Punjabi restaurants and home kitchens, I’ve learned it strikes this perfect balance between traditional flavors and a recipe that’s doable at home. This version cuts down on the waiting time but keeps all the depth and comfort you expect.
What You’ll Need
From my experience, the secret to great dal makhani lies in picking the right ingredients and using the right amounts. Here’s what you should have on hand:
- 1 cup whole black urad dal (sabut urad dal)
- 1/4 cup kidney beans (rajma)
- 3 cups water (for pressure cooking the legumes)
- 2 medium onions, finely chopped
- 3-4 cloves garlic, minced
- 1-inch piece of ginger, grated
- 2 large tomatoes, pureed
- 2 tablespoons ghee (clarified butter)
- 1 tablespoon unsalted butter
- 1/2 cup fresh cream
- 1-2 green chilies, slit (optional, for moderate heat)
- 1 teaspoon cumin seeds
- 1 teaspoon coriander powder
- 1/2 teaspoon turmeric powder
- 1 teaspoon garam masala
- 1 teaspoon red chili powder (adjust to taste)
- 1 teaspoon kasuri methi (dried fenugreek leaves), crushed
- Salt to taste
- Fresh coriander leaves for garnish
When it comes to the ingredients, I’m pretty picky. I always go for whole black urad dal instead of the split kind because it gives that real, authentic texture and flavor, even if it takes a bit longer to cook. Kidney beans are great for adding some heft to the dish, but don’t forget—they need a good soak, or they’ll stay tough. Fresh cream and ghee aren’t just about richness; they bring that silky, melt-in-your-mouth feel you can’t skip. And if you manage to grab some quality kasuri methi, use it—its subtle aroma really lifts the whole thing. As for the budget, black urad dal and kidney beans usually run about ₹150 for 500g at most Indian grocery stores, which is perfect if you’re cooking a large batch.
Cooking Instructions Made Easy
How you handle the legumes really makes or breaks the dish. Here’s the approach I swear by: first, soak them well to make sure they cook evenly and become tender without losing their shape. Patience is key here—it’s worth the wait to get that perfect texture before moving on to the next steps.
Getting the Legumes Ready
Begin by giving 1 cup of whole black urad dal and 1/4 cup kidney beans a good rinse. Then, soak them together in plenty of water—make sure it’s at least 2 to 3 inches above the legumes—for a solid 8 hours or ideally overnight. Trust me, skipping this step will only mean longer cooking times and beans that end up uneven or tough, which nobody wants.
Pressure Cooking
After soaking, drain the legumes and pop them into your pressure cooker. Add 3 cups of fresh water and a teaspoon of salt. Seal up the lid and cook on medium heat for about 20-25 minutes—roughly 5 to 6 whistles—until the beans are tender but still hold their shape. I've found that cooking them too long at this point makes the dal overly thick, and it loses that lovely creamy texture when it simmers later. When done, let the pressure drop naturally before opening the cooker.
Making the Tadka (Tempering) Just Right
Start by warming 2 tablespoons of ghee in a deep pan over medium heat. When it’s hot, add a teaspoon of cumin seeds and listen for that satisfying sizzle. Then toss in 2 chopped onions and let them cook slowly until they turn a beautiful golden brown—this takes about 10 minutes. Trust me, rushing this step won’t give you that sweet, rich flavor that comes from properly caramelized onions. Once they’re ready, stir in a tablespoon of ginger-garlic paste and cook for another couple of minutes until the raw aroma fades away.
Next comes the pureed tomatoes—about 2 cups, freshly blended. Pour them in and let everything simmer gently on low heat for 15 to 20 minutes. This slow simmer helps mellow the acidity and brings out a deeper, richer tomato flavor. Then toss in a teaspoon each of turmeric, coriander powder, and red chili powder, plus salt to your taste. Keep stirring as you cook until you see the oil start to separate from the masala, which means you’re right on track.
Slow Simmer for That Perfect Creamy Texture
Pour the cooked lentils along with their cooking water into the pan with your seasoned tadka. Give it a good stir, then turn the heat up just enough to bring it to a gentle boil. Once there, lower the heat and let it simmer, uncovered, for about an hour to an hour and a half. Every 10 to 15 minutes, give it a stir to stop it from sticking to the bottom. This slow simmer is where the magic happens—the dal thickens up, and all those flavors start to marry beautifully. If it feels too thick along the way, just splash in a bit more water to loosen it up.
Finishing Touches
When your dal has reached that lovely creamy stage, stir in a tablespoon of unsalted butter, half a cup of fresh cream, and a teaspoon of crushed kasuri methi. Let it cook gently for another five minutes over low heat. The butter and cream mellow everything out without drowning the spices, bringing a nice richness that’s just right. Before you dig in, sprinkle on some freshly chopped coriander leaves to add that fresh, herbal punch.
Tips and Tricks for Cooking
I’ve found that getting the spice mix just right in dal makhani can be a real balancing act. After a few trial-and-error attempts, here’s what works best for me:
Getting the Spice Balance Right
If you’re sensitive to heat, I’d recommend starting with just half a teaspoon of red chili powder instead of a full one. You can always add more next time if you want it spicier. The green chilies bring a fresh kind of heat that doesn’t overpower the dish, which I love. The trick is to layer your spices — toss in half the chili powder while cooking the tomatoes and save the rest for when the dal simmers. It really helps build depth without turning your mouth into a fire zone right away.
Getting the Texture Just Right
What you’re after is a dal that’s thick and creamy—thick enough to coat the back of your spoon but still loose enough to pour slowly. If it starts looking more like glue, don’t panic. Just stir in about a quarter cup of water and keep an eye on it as it simmers. On the flip side, if it’s too runny, it loses that warm, comforting vibe we’re all after. Also, I found that giving it a good stir every 10 minutes or so is a lifesaver—prevents sticking and burning, especially if you’re letting it cook low and slow for a good while.
Cooking with Stovetop vs. Instant Pot: What You Need to Know
If you’re using an Instant Pot, you can cut down the cooking time quite a bit. I usually pressure cook soaked legumes on the “beans/lentils” setting for about 25 minutes. After that, I switch to sauté mode to make the tadka and then let it simmer briefly. But here’s the catch—the slow simmer is where the real flavor builds up, and the Instant Pot isn’t great at giving you that gentle simmer. So, if you can, I’d suggest finishing it off on the stovetop for at least 20 minutes to deepen the taste. Trust me, it makes a difference.
Managing Heat and Stirring for Best Results
My rule of thumb here is to cook low and slow. Cranking up the heat just makes the dal cling to the pot and burn, especially as it starts to thicken. I usually keep the stove on medium-low and give it a stir every 10 to 12 minutes with a silicone spatula while it simmers. It takes a bit of patience, but trust me, the rich, creamy result is totally worth it.
Variations and Substitutions
After making dal makhani more times than I can count, I’ve played around with a few tweaks here and there. Here are some of my favorite ways to mix it up:
Vegan-Friendly Swaps
Instead of dairy cream, try using half a cup of coconut cream or cashew cream—they give that nice creamy texture without the dairy. For fats, swap out ghee or butter with vegan butter or a good drizzle of olive oil. The texture won’t be as rich, but it still feels smooth and comforting. I made this version for a vegan friend once, and while it lacked that cozy, buttery warmth ghee gives, the flavor stayed spot-on.
Mixing Up Legume Choices
Some cooks like to toss in split red lentils or yellow moong dal to speed things up and make the dish a bit lighter. I’ve tried that too, but honestly, it changes the whole vibe. The rich, filling feel you get from urad dal and kidney beans just isn’t the same when you swap them out.
Spice Adjustments
If you’re craving a smoky flavor but don’t have a tandoor or charcoal handy, here’s a little trick: add about 1/4 teaspoon of smoked paprika, or toss a small dried red chili in with your cumin seeds while they sizzle. I’ve played around with this, and it gives a gentle, smoky note that’s just right—not too strong. If you prefer things on the mild side, just dial back the chili powders a bit.
How Caramelized Onions Add Real Flavor
Some recipes call for blending in extra caramelized onions into the dal, which I’ve tried a few times. It adds a nice, subtle sweetness but definitely takes more time. I find it makes the dal a bit thicker and heavier, so I usually save this step for when I’m treating guests or making something a little more special.
Best Sides and Serving Ideas
Dal makhani deserves some great partners on the plate! Here’s what I usually like to serve alongside it:
Perfect Pairings
When it comes to Indian meals, you can’t go wrong with buttery naan — it’s soft, pillowy, and just right for scooping up dal. If you want to switch things up, fragrant basmati rice or cumin-spiced jeera rice work just as well. Here’s a tip from my kitchen: cook 1 cup of basmati rice with 2 cups of water and a teaspoon of cumin seeds. It’s a simple, no-fuss side that brings out great flavor without much effort.
Tasty Side Dishes That Hit the Spot
A cool cucumber raita made with a cup of yogurt, chopped cucumber, and just a pinch of salt is perfect for cutting through the richness. I always love adding Indian pickles like mango achar—it gives a nice sharp kick. And a simple mix of tomatoes, onions, and a squeeze of lemon adds the perfect crunch and freshness to the meal.
Serving Ideas for Different Occasions
On most weeknights, I keep things easy with rice and dal. But when friends or family drop by, or during special occasions, I like to throw in some sautéed paneer or a flavorful vegetable curry. It turns a simple meal into a satisfying spread everyone enjoys.
Mistakes You’ll Want to Dodge
Don’t sweat it—I tripped up on these three classic mistakes myself before learning the ropes.
- Overcooking or Undercooking Legumes
Overcooked dal turns gluey, undercooked makes it grainy or hard. Stick to 20-25 minutes pressure cooking for soaked legumes; adjust slightly based on your cooker. - Skipping Soaking or Pressure Cooking
Some think soaking isn’t necessary, but post-soak cooking time halves. Skipping pressure cooking results in unevenly cooked beans—no texture balance. - Using Too Much Cream or Butter
I found that adding too much cream or butter causes the dal to feel heavy and greasy instead of smooth. Stick to 1/2 cup cream and 1 tablespoon butter per batch for moderate richness. - Neglecting Tadka
Proper tempering of spices and slow cooking onions bring layers of flavor. Skipping this makes the dish bland despite all the dals and cream.
Tips for Storing and Prepping Your Meals
Dal makhani is one of those dishes that actually gets better the next day, making it perfect for cooking ahead. Here’s what I usually do to store it without losing any of that rich flavor.
Refrigeration
Dal keeps nicely in the fridge for up to four days, and you might be surprised to find the flavors only get richer after sitting overnight. When it's time to reheat, warm it gently on low heat, adding a little water or cream to bring back that velvety texture. Just be careful not to let it boil too hard—that can cause the dal to separate and lose its smoothness.
Freezing Tips
If you want to keep dal makhani around longer, freezing works great. Store it in airtight containers and it’ll last about a month. When you're ready to eat, thaw it in the fridge overnight and then reheat. It’s a lifesaver for busy days when you want something quick, hearty, and homemade.
Meal Prep Ideas
On weekends, I like to make a big batch and then divide it up with some rice or frozen naan for easy lunches or dinners during the week. Just before serving, I toss on some fresh coriander and squeeze a lemon wedge over the top—it really brightens things up.
Adapting for Dietary Needs
This recipe is naturally gluten-free, but there are a few things to keep in mind:
Gluten-Free Status
When picking up pre-mixed spice powders or canned goods, double-check the labels for any hidden additives. But if you stick to buying whole spices or dried lentils, you'll be in the clear—they're naturally gluten-free and really fresh when sourced locally.
Vegan Modifications
Like we talked about earlier, swapping out cream for coconut or cashew cream works well, and plant-based butter alternatives can do the job too. The flavors might be a bit different, but honestly, it’s still delicious and hits the spot.
Lower-Fat Versions
If you’re watching your calories, try cutting the butter and cream by half. Then, toss in a spoonful of Greek yogurt to thicken things up with a nice tang. Just be careful not to heat it too much, or you’ll end up with curdled mess instead of a smooth finish.
Allergy Notes
If you have a nut allergy, it’s best to skip the cashew cream swap and stick with coconut cream instead—it's a safer bet and just as creamy.
FAQs
Making dal makhani from scratch isn’t a quick fix—it usually takes around 2 to 3 hours, including soaking the lentils and letting everything simmer slowly. You’ll spend about 30 to 40 minutes actively prepping, but the rest is mostly waiting.
Sure, you can use canned beans to save time, but honestly, I wouldn’t recommend it. The texture isn’t quite the same, and you miss out on that rich, slow-cooked flavor you get from dried lentils. If you do go canned, just remember to cut down cooking time and tweak the liquid so it doesn’t get too soupy.
So, what sets dal makhani apart from your everyday dal? The key is in the ingredients and the cooking style. Dal makhani uses whole black urad lentils and kidney beans, cooked low and slow with generous amounts of cream and butter. Regular dal usually features split lentils and has a much lighter texture since it cooks up quicker. The richness and depth of dal makhani come from that creamy, buttery slow-cooking process, which regular dal just doesn’t have.
Want to get that smoky flavor in your dal without a tandoor? Here’s a neat trick I picked up: place a small piece of smoked charcoal in a heatproof bowl inside your cooking pot, cover it, and let it sit for about five minutes. It imparts a subtle smoky touch. Alternatively, a pinch of smoked paprika can do the job. It won’t be exactly like tandoor-cooked, but it gets you pretty close without fiddling with a fire pit.
Is dal makhani okay for someone watching their blood sugar? The lentils are packed with protein and fiber, which are great. But the cream and butter add extra richness—and calories—so it’s best to watch your portion size. One way around this is to use less cream or swap in yogurt, and pair your dal with whole grains like brown rice or millet to keep things balanced.
Can you make dal makhani in an Instant Pot? Absolutely! It really speeds up the cooking thanks to the pressure function. Just make sure to finish it off by letting it simmer on the sauté mode for a bit—that’s where the rich, deep flavors really come alive.
So, what’s kasuri methi, and can you skip it? Kasuri methi is dried fenugreek leaves that bring a unique, slightly bitter aroma and taste to the dish. If you don’t have it on hand, it’s not a dealbreaker, but if you can track some down, I promise it’ll take your dal makhani up a notch.
Conclusion
This dal makhani recipe keeps things honest—staying close to traditional flavors but without any complicated or time-consuming steps that make it hard to do at home. It’s perfect if you enjoy slow cooking and don’t mind spending a few hours in the kitchen for a truly satisfying meal. I encourage you to adjust the spices, cream, and cooking time to make it your own. Trust me, jot down what works best for you and enjoy the process—it’s about the journey as much as the final dish. If you prefer straightforward, practical recipes that actually deliver, this one should become a favorite. Give it a go, tweak it to your taste, and most importantly, have fun cooking!
If you’re curious to try more, check out my posts on “5 Easy Indian Lentil Recipes for Everyday Cooking” and “Traditional Punjabi Butter Chicken: A Simple Guide.” Both are favorites in my kitchen and perfect for anyone wanting to spice up their meals without fuss.
Don’t forget to subscribe if you want more authentic Indian recipes coming your way. And follow me for handy cooking tips and ideas to bring a little more flavor to your table every day.
If this topic interests you, you may also find this useful: https://www.cravediary.com/blog/best-dal-makhani-recipe-for-rich-creamy-flavor