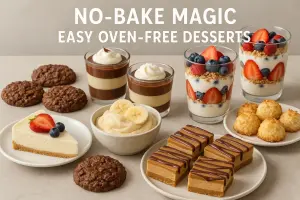
Introduction
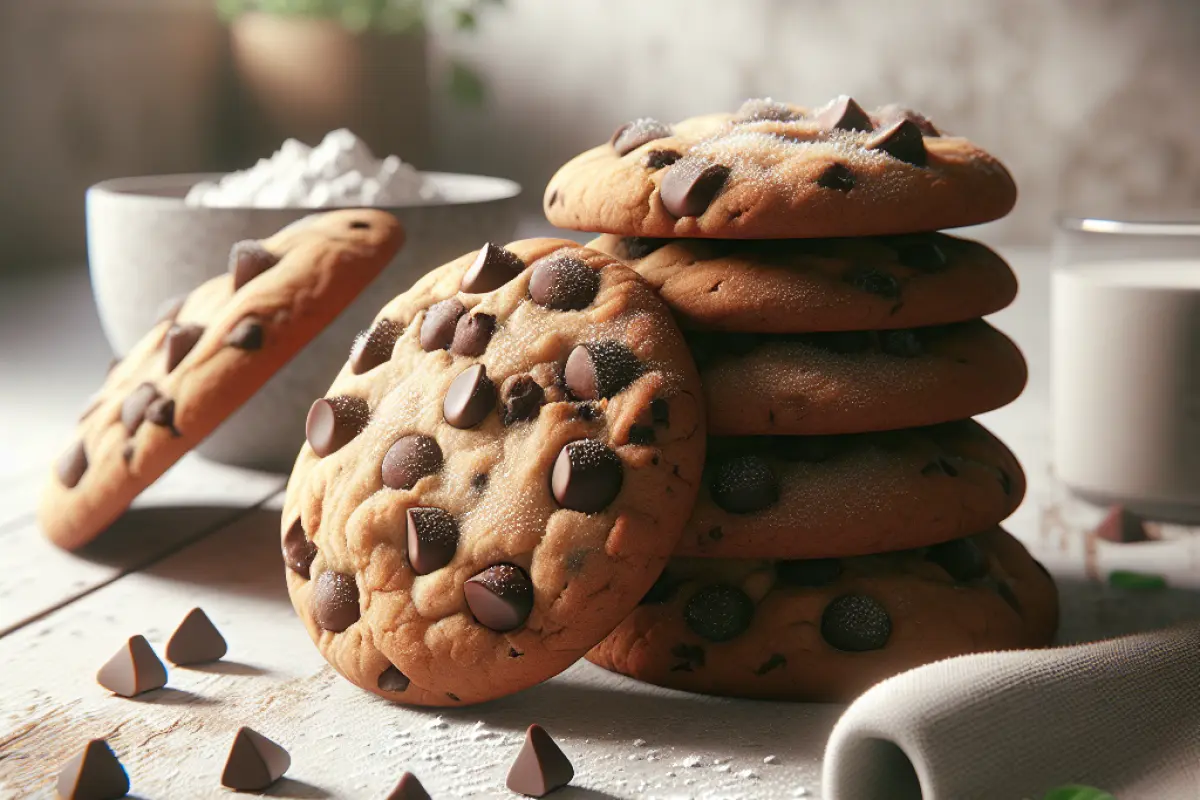
Over time, I've realized there's not much better than biting into a warm, gooey chocolate chip cookie—the way the sweet and salty flavors mingle just right. Baking these cookies at home has become a favorite little hobby of mine. I love tweaking recipes and playing around with ingredients to get that perfect texture and taste. Whether you’re a seasoned baker or trying your hand at it for the first time, this guide will help you make chocolate chip cookies that always turn out just right. If you want a classic dessert that’s sure to please, or a dependable recipe to keep in your back pocket, you’re in the right place. By the end of this post, you’ll have handy baking tips, ingredient know-how, and tricks I've picked up from plenty of cookie experiments to make baking a breeze.
A Quick Look at Chocolate Chip Cookies
Chocolate chip cookies have a simple but interesting origin that goes back to the 1930s, when Ruth Wakefield accidentally added chunks of chocolate to her cookie dough. Since then, these cookies have become a beloved classic worldwide. At their base, chocolate chip cookies are just a mix of flour, sugar, butter (usually), eggs, baking soda, salt, vanilla, and the star ingredient—chocolate chips. How these ingredients come together is what decides if you end up with a soft, chewy center or a crisp, golden edge.
I still remember my first real try at baking chocolate chip cookies back in 2005. I had nothing but a simple recipe and a big dose of curiosity. What caught me off guard was how tiny tweaks—like swapping out the sugar or messing with how long I creamed the butter and sugar—completely changed the cookie’s taste and texture. That little kitchen experiment hooked me fast and launched a rabbit hole of testing recipes and fine-tuning every step. I bet any home baker knows that satisfying chase for the perfect cookie bite.
Why This Cookie Recipe Stands Out
You might wonder why bother baking chocolate chip cookies at home when you can grab a pack from the store anytime. From my kitchen experience, it’s really about having control—over what goes in, how soft or crunchy they turn out, how sweet they are, and how fresh you want them. This recipe is simple to start but tricky enough to teach solid baking basics, like getting the butter and sugar creamed just right and knowing when your dough is ready to bake. It’s a fantastic way to learn and really make the cookie your own.
After visiting bakeries more times than I can count and trying out my own recipes at home, I’ve learned that a great chocolate chip cookie is more than just a sweet bite—it’s comfort wrapped in a little crispy-chewy package. The best part? You know exactly what’s going into it—no preservatives, just ingredients you trust and flavors tweaked just the way you like. Plus, cookies are flexible: whether you want them soft and cakey or crunchy and firm, you can make them fit your mood.
I won’t sugarcoat it—it’s not a get-it-right-the-first-time recipe. You’ll need patience and a bit of focus. For instance, your butter should be soft enough to mix but definitely not melted, and chilling the dough is a must if you want thick, tender cookies. Also, ovens can be a challenge since they don’t always heat evenly, so keep an eye on the timer and temperature. But don’t let that scare you—the learning curve is part of the fun, and you’ll pick up some handy baking tips along the way.
Ingredients You’ll Use
After testing countless recipes over the years, here are the ingredients I swear by for the best results:
- 2 1/4 cups (280g) all-purpose flour: This is your basic foundation. I stick to all-purpose because it gives a good balance of structure and tenderness.
- 3/4 cup (150g) granulated sugar and 3/4 cup (165g) brown sugar: The mix of sugars provides sweetness and moisture. Brown sugar adds chewiness and a slight caramel flavor thanks to its molasses content.
- 1 cup (225g) unsalted butter, softened to about 20°C: Unsalted is best, so you control the saltiness. Don’t let the butter get melted—it should be soft but still hold its shape. Getting this step wrong can lead to cookies that spread too thin.
- 2 large eggs, at room temperature: This helps the dough bind properly and allows for better mixing with the butter and sugar.
- 1 teaspoon baking soda and 1 teaspoon salt: Baking soda is your leavening agent that gives the cookies their rise; salt enhances the overall flavor.
- 2 teaspoons pure vanilla extract: Vanilla adds depth and rounds out the sweetness.
- 1 1/2 cups (270g) semisweet chocolate chips: I usually stick to semisweet, but mixing in some dark or milk chips can add flavor complexity.
If you want to mix things up a bit, try tossing in some chopped walnuts or pecans—about half a cup (around 50 grams). Adding oats in the same amount (about 45 grams) also gives a nice, chewy texture.
A quick heads-up from my kitchen experiments: using salted butter by mistake was a total game-changer—in a bad way. The salt threw off the balance and made the cookies taste weird. Also, swapping brown sugar for molasses can work, but expect a denser, chewier cookie. And when it comes to chocolate, steer clear of those cheap chips coated in wax; real chocolate chips hold their shape and taste way better after baking.
How to Bake Perfect Cookies, Step by Step
- Preheat your oven to 175°C (about 350°F) and line two baking sheets with parchment paper or silicone mats. This prevents sticking and helps with even baking. Make sure your oven rack is in the middle for consistent heat.
- Cream the butter and sugars together in a stand mixer (or with a handheld mixer) on medium speed for about 3-5 minutes until light and fluffy. This step is crucial because it incorporates air, helping your cookies rise and get a tender texture. Don’t rush this part—if you skim it, cookies turn dense.
- Add the eggs one at a time, blending well after each addition, then pour in the vanilla extract. Try to keep the mixer speed low so the mixture doesn’t curdle. If it looks like it’s separating, stop mixing and scrape the bowl before continuing.
- In a separate bowl, sift together the all-purpose flour, baking soda, and salt. This ensures even distribution and prevents clumps.
- Slowly add the dry ingredients to the wet mix, stirring gently with a spatula or on low speed until just combined. Overmixing here is a common mistake that makes cookies tough because of gluten development.
- Fold in the chocolate chips (and nuts or oats if using) evenly throughout the dough.
- Portion out the dough by spooning or using a medium cookie scoop (about 1 1/2 tablespoons or 30g per cookie) onto the prepared sheet, spacing them about 2 inches apart. Uniform sizing helps with even baking, so try to keep your scoops consistent.
- Bake in the preheated oven for 10-12 minutes. Keep an eye on them; cookies are done when the edges look set but the centers still appear soft. They’ll continue to cook as they cool. Avoid overbaking to keep that moist interior.
- Cool the cookies on the baking sheet for 5 minutes, then transfer to a wire rack to cool completely. Leaving them on the tray too long can cause sogginess, and moving them too soon can break them.
I’ve learned the hard way that skipping proper cooling times can wreck your cookies — either they fall apart the second you touch them, or they end up dry and overbaked. One time, I pulled a batch out too soon and they crumbled in my hand like sand. On another occasion, I got distracted and left them in too long, turning them into little hockey pucks. Timing really matters!
Handy Tips and Tricks for Baking Success
Why does chilling dough actually make a difference? From my experience, letting cookie dough rest in the fridge for at least an hour—sometimes even overnight—helps the fats firm up. This means your cookies won’t just melt into a thin puddle when they hit the oven; instead, they hold their shape better and come out thicker and chewier. I like to scoop out and shape the dough after chilling because it’s firmer and way easier to handle.
The temperature of your butter really matters. If your butter is soft, around 20°C, it blends smoothly with sugar, trapping tiny air bubbles that give your cookies a great texture. But if the butter’s too soft or melted, your cookies spread too much and bake unevenly. I keep a digital kitchen thermometer handy to check—yeah, it sounds a bit intense, but honestly, it’s saved me from a lot of cookie disasters.
Oven hotspots are something a lot of home bakers overlook, but they can seriously mess with your cookies. My earliest batches were uneven because one corner of my old oven ran hotter. Once I started turning the baking sheets halfway through, the cookies browned more evenly across the tray. If you don’t have an oven thermometer yet, grab one—they’re cheap (around ₹300-500) and take the guesswork out of baking.
Switching to parchment paper or silicone mats made a huge difference for me. Not only do they keep things from sticking, but they help bake the bottoms evenly without burning. Plus, cleaning up is way easier—definitely a simple trick that pays off big time!
Figuring out when something’s perfectly baked without opening the oven door all the time can be tricky. I rely on the “edge check”: when the edges turn a soft golden color and the center looks set but not shiny, that’s usually spot on. Every time you open the door, heat escapes, which can mess with the baking time.
Mix-Ups and Swaps
I’ve experimented with a few different mix-ins and substitutions along the way. Here’s what I’ve found actually works based on my experience:
- Nuts: Chopped walnuts or pecans (about 1/2 cup) add crunch and a nutty flavor. Toast them lightly to intensify flavor.
- Chocolate: Using a mix of semisweet and dark chocolate chips (or chunks) helps create varied intensity without overpowering sweetness. White chocolate chips are fun but watch sugar levels, as they’re sweeter.
- Oats or coconut flakes (1/2 cup): These change texture and chewiness, giving a rustic twist. Oats absorb moisture, so you may want to add an extra tablespoon of butter in this case.
- Butter substitutes: Coconut oil or vegan butter work if you want dairy-free. Coconut oil can add a subtle flavor, but cookies may spread more, so chilling the dough is crucial.
- Gluten-free: Swapping wheat flour with a premade gluten-free mix (about 280g) generally works, but texture may be drier or more crumbly. I add an extra egg white or tablespoon of milk to improve moisture.
Keep in mind, swapping ingredients can change how long your cookies need to bake—gluten-free batches tend to cook a bit quicker, so I’d start checking around the 8-minute mark. If you like tweaking recipes, these variations are worth a shot. But if you want that classic cookie texture, it’s best to stick with the original ingredients.
Tasty Serving Ideas and Pairings
How do I enjoy chocolate chip cookies? Without a doubt, dunking a warm cookie into a cold glass of milk is my go-to. That mix of warm, gooey cookie and chilly milk hits just the right spot every time.
Another favorite way to enjoy cookies is with a cup of coffee or tea. I find a light roast coffee or a fragrant black tea with floral notes pairs perfectly—sweet enough to balance the cookie, but never overpowering.
Feeling a bit daring? Try making ice cream sandwiches by slapping a scoop of vanilla or salted caramel ice cream between two cookies. It can get a little messy, but trust me, it’s absolutely worth it.
Crumbled cookies aren’t just for snacking—they’re fantastic sprinkled over pudding, yogurt, or even your morning breakfast bowl. I remember one weekend brunch when I tossed some cookie crumbs into fruit parfaits, and my friends couldn’t stop raving about the crunchy twist it added. It’s a simple little change that makes a big difference.
Mistakes You’ll Want to Skip
I’ve run into a few bumps along the way, so here’s a list of common mistakes to watch out for—learn from my slip-ups and save yourself the hassle!
- Overmixing dough: Once you add flour, mix only until it disappears. Overdoing it develops gluten, making cookies tough.
- Skipping dough chill: Not chilling means cookies spread too thin and lose their chewy texture.
- Incorrect oven temperature: Homemade ovens can vary by 10-20 degrees. Too hot burns edges before centers cook; too cool makes cookies pale and cakey. Use an oven thermometer and watch carefully.
- Using salted butter: I accidentally used salted butter on one batch, and cookies tasted too salty and unbalanced.
- Uneven cookie sizing: Scooping different sizes causes some cookies to burn while others stay undercooked. I recommend using a standard cookie scoop.
Storing and Preparing Your Cookies
When it comes to keeping cookies fresh, I usually stash them in airtight containers at room temperature. They stay soft and tasty for about 4 to 5 days before they start to dry out and lose their charm.
If you want to enjoy fresh-baked cookies anytime, freezing the dough is a total game-changer. I roll the dough into 30-gram balls, freeze them on a baking sheet for a couple of hours, then pop them into a freezer bag. When the craving hits, just bake them straight from the freezer—add an extra minute or two to the baking time, and voilà, warm cookies ready whenever you want.
If your cookies have gone a bit stale, pop them in a 160°C oven for about 3 minutes. It brings back some of that fresh-baked softness and makes them taste almost like new.
Here’s a little time-saver: bake a double batch and freeze half for later. It’s a real lifesaver when unexpected guests drop by or when you want to pull together a quick homemade treat without the fuss.
Dietary Tips and Alternatives
Figuring out different dietary needs has made me tweak this recipe so more people can enjoy it.
- Gluten-free: Use 280g of a good gluten-free flour blend. Sometimes adding 1 tsp of xanthan gum helps with texture.
- Dairy-free: Substitute 225g vegan butter or solid coconut oil. The flavor changes slightly, and cookies can be a bit more fragile.
- Sugar reduction: You can try cutting sugar by 25%, but be aware the texture will be less tender and more biscuit-like.
- Egg-free: Flax egg (1 tbsp flaxseed meal + 3 tbsp water, set for 5 mins) works as an egg replacer but expect denser cookies.
Each swap changes the flavor and texture a bit, so I’d suggest trying them out little by little. You might stumble on a mix that feels just right for you.
FAQs
- Can I use melted butter instead of softened?
I’ve tried it, but melted butter causes cookies to spread too much and become thin. Softened butter is best for structure. - How do I make my cookies chewier?
Use more brown sugar (at least a 50:50 ratio), slightly underbake them, and chill the dough for at least one hour. - Why did my cookies turn out cakey or dry?
Often from overmixing flour or overbaking. Try mixing until just combined and check on cookies a minute or two earlier. - Is it necessary to chill the dough?
I highly recommend it. Chilling solidifies fats and prevents spreading, giving thicker, chewier cookies. - How long can I store baked cookies?
Stored airtight at room temp, 4-5 days. Freezing dough or baked cookies extends freshness up to 3 months. - Can I substitute chocolate chips with chunks or chopped bars?
Yes, chunks cook well and give a varied texture. Just cut even pieces about 1 cm in size for even distribution. - What’s the best way to prevent cookies from spreading too much?
Use chilled dough, make sure your butter isn’t too soft or melted, and avoid over-greasing baking sheets.
Conclusion
Baking chocolate chip cookies might seem simple, but there’s a bit of an art to it. The key is using good ingredients, watching the temperature, and handling the dough just right. With some practice, anyone can bake cookies that turn out great every time. If you like recipes that come from real experience and not just hype, this one’s for you. Give it a go, tweak it to your taste, and enjoy the whole baking process.
If you’re curious to sharpen your baking skills, you might want to check out “Mastering Cookie Baking Techniques for Consistent Results.” It’s packed with practical tips I’ve found helpful when aiming for that perfect batch. Also, “Dessert Recipes for Beginners: Simple Sweets to Boost Confidence” is a fantastic spot to start if you’re just getting your feet wet in the world of baking.
Make sure to subscribe if you want more reliable recipes and handy tips coming your way. And don’t forget to follow along on social media—it's a great way to connect with fellow bakers and share your own kitchen adventures!
If this topic interests you, you may also find this useful: https://www.cravediary.com/blog/complete-guide-to-butter-chicken-recipe-tips-secrets