Mastering Homemade Pizza: A Step-by-Step Guide
Getting Started with Pizza Making at Home
I’ll never forget the first time I tried making pizza from scratch at home. The dough was a sticky mess, the sauce turned out a little too salty, and the finished pizza? Let’s just say it looked more like a sad pancake than the classic pie I had in mind. But the smell wafting through the kitchen? Absolutely irresistible—it kept me coming back for more. Over time, I realized the real secret is nailing the dough—it completely changes the game and makes the whole process a lot more fun. If you love cooking and want to take control over exactly what goes into your pizza, this skill is definitely worth learning. This guide walks you through making pizza from scratch, packed with practical tips and tricks I’ve picked up after plenty of kitchen experiments. By the end, you’ll have a simple recipe and the confidence to tweak it your way.
Why This Pizza Recipe Stands Out
Pizza hardly needs an introduction—it’s one of those dishes that’s everywhere and yet feels so personal. Over the years, I’ve found making pizza at home beats ordering out in a few big ways. For one, the freshness is unbeatable—you know exactly what’s going into it. And the best part? You get to tailor it exactly how you like, whether that means loading on extra veggies or cutting back on cheese. Plus, homemade pizza is wallet-friendly; feeding three to four people at home costs around ₹300-₹500, which adds up way less than regular takeout. For me, the joy isn’t just in eating but in the whole process—the aroma filling the kitchen, that perfect crispy crust, and of course, the satisfying cheese pull when you dig in. After tasting pizzas in Italian pizzerias and experimenting with recipes in my own kitchen, I can say a few tweaks to dough and baking really change the game.
Essential Ingredients for Your Pizza
Making pizza starts with the basics. First, you'll gather your ingredients, which break down into four simple parts: dough, sauce, cheese, and your favorite toppings.
When it comes to the dough, here’s what I suggest:
- 3 cups strong bread flour (preferably Italian tipo 00 if you can find it)
- 1¼ cups lukewarm water (around 38°C)
- 2 teaspoons dry active yeast
- 1½ teaspoons fine sea salt
- 1 tablespoon extra virgin olive oil
- 1 teaspoon sugar
The type of flour you pick really makes a difference. Bread flour, with its higher protein, builds the gluten that gives you that perfect stretch and chew. On the other hand, Tipo 00 flour is finer and softer, giving your dough a smooth, silky texture, though it can be a bit pricier. As for yeast, I stick with dry active yeast since it's easy to store and dependable. Instant yeast works just as well if that’s what you have on hand.
For the sauce:
- 400g canned San Marzano tomatoes or similar whole peeled plum tomatoes
- 2-3 cloves garlic
- 1 tablespoon extra virgin olive oil
- 1 teaspoon dried oregano
- Salt to taste
I prefer using whole canned tomatoes and crushing them myself—there’s just something about the texture and rich, fresh flavor you get that store-bought sauces can’t match.
Cheese:
- 250g fresh mozzarella (buffalo or cow's milk)
- 50g grated Parmesan or Pecorino Romano
Fresh mozzarella is a game-changer; it melts into a creamy, dreamy layer that’s hard to beat. I like to add a sprinkle of grated hard cheese for a little extra punch and depth.
When it comes to toppings, I usually keep things straightforward—about 100g of sliced mushrooms, the same amount of pepperoni or cooked sausage, a handful of fresh basil leaves, a few thin red onion slices, and some colorful bell peppers. What’s great is you can tweak it to fit your budget—fresh veggies or meats usually cost between ₹50 and ₹200, so there’s plenty of room to play.
If you want to put together a meal quickly, keep a few pantry basics like dried oregano, chili flakes, and olive oil within reach. They don’t cost much but really take your dish up a notch.
How to Cook It, Step by Step
Now comes the best part—bringing all those ingredients together to make a pizza you’re eager to dig into.
Making the dough:
Grab a large bowl or your stand mixer with a dough hook, and stir together 2 teaspoons of active dry yeast and 1 teaspoon of sugar into 1¼ cups of lukewarm water. Let it hang out for about 10 minutes until you see bubbles pop up—that’s your green light that the yeast is doing its thing.
Next, toss in 3 cups of bread flour and 1½ teaspoons of salt, followed by a tablespoon of olive oil. If you’re using a mixer, start it on low. If you’re going old-school with a wooden spoon, just dive right in and start mixing.
Now knead that dough for about 8 to 10 minutes until it becomes smooth and stretchy. If you’re working it by hand, it might take a little longer, but stick with it—you’ll feel the dough transform under your hands.
Pop the dough into a bowl lightly coated with oil, then cover it with a damp cloth or some cling film. Set it aside at room temperature and let it do its thing for about an hour to an hour and a half—just wait until it’s puffed up to roughly double its original size.
While the dough is busy rising, it’s the perfect time to whip up your sauce.
Grab a bowl and crush 400g of canned whole tomatoes with your hands or a masher until chunky. Meanwhile, heat a tablespoon of olive oil in a small pan over medium heat. Toss in 2 or 3 crushed garlic cloves and let them sizzle gently for about a minute—watch carefully, you don’t want that garlic to burn!
Stir in the crushed tomatoes, add a teaspoon of dried oregano, and season with salt to your liking. Let the sauce bubble away gently for about 15 to 20 minutes, giving it a stir now and then so it doesn't stick.
Once your dough has doubled in size, crank your oven up to 250°C (that’s around 480°F) or as hot as it will go. Pop a pizza stone or a heavy baking tray inside and let it heat up for at least half an hour—this step makes all the difference for a crispy base.
Tip your dough out onto a floured surface and divide it into two equal balls—that'll make perfect medium pizzas. Let them rest for about 10 minutes before shaping; this little break makes the dough so much easier to work with.
Gently roll out or stretch the dough into a circle about 10 to 12 inches across. Keep the edges a bit thicker than the center—this is what gives you that nice, chewy crust.
Carefully slide the dough onto a sheet of parchment paper—it makes moving the pizza around a whole lot easier, especially when you’re getting it into the oven.
Spread 3 to 4 tablespoons of sauce evenly over the dough, but leave about an inch of space all around for the crust to puff up and crisp nicely.
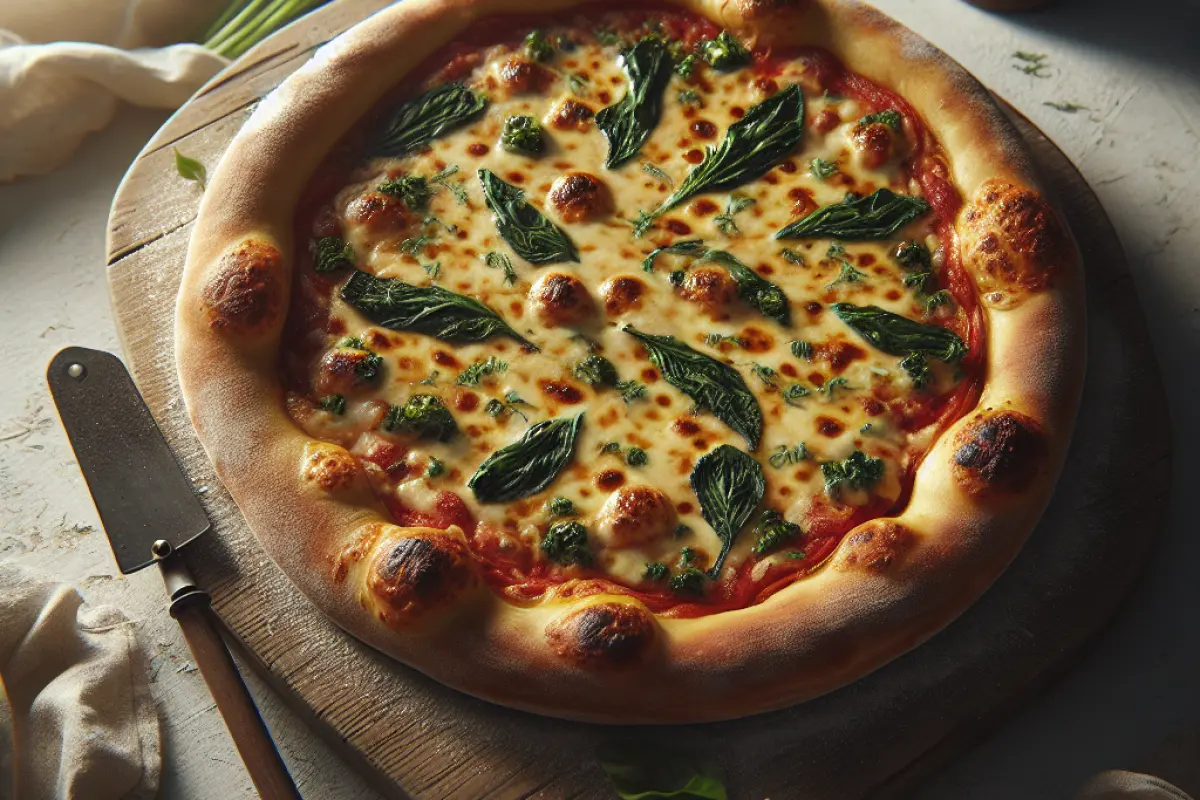
Scatter about 150 grams of fresh mozzarella, sliced up nicely, over the dough. Add your favorite toppings too, but keep it around 150 to 200 grams total—too many toppings can make the crust soggy and weigh it down.
Carefully slide the pizza, still on the parchment paper, onto the hot pizza stone or baking tray in your oven.
Let it bake for 7 to 10 minutes until the crust turns a beautiful golden brown and gets crispy, while the cheese starts bubbling and picks up a little color.
As soon as you take the pizza out of the oven, toss on some fresh basil leaves and finish it off with a good drizzle of extra virgin olive oil.
Let the pizza sit for about 5 minutes before you slice into it—this little pause really helps the flavors settle and keeps the toppings from sliding off.
Handy Cooking Tips
Getting the dough just right comes down to kneading it properly. Skimp on this step, and you'll end up with a crust that's dense and crumbly—definitely not what you're after. I’ve learned it’s all about pressing, folding, and stretching the dough for around 8 to 10 minutes until it bounces back when you poke it. That’s when the gluten has developed enough to give you that perfect chewiness.
Wondering how to tell when the dough’s ready after rising? I usually give it a gentle poke with my finger—if the dent stays and the dough doesn’t spring back right away, it’s good to go. It’s tempting to rush this part, but don’t—you'll miss out on the fuller flavor that comes with a proper proof.
The oven temperature is a big piece of the puzzle too. Most home ovens top out at about 250°C, which is quite a bit cooler than the 400°C-plus you get in commercial pizza ovens. To get closer, I always preheat a pizza stone or a heavy baking tray for at least 30 minutes—it soaks up the heat and helps give you that crisp, bubbly base like you’d find in a pizzeria.
To keep your pizza crust from turning soggy, avoid piling on too much sauce or too many toppings. A thin, even spread works much better. If you find the bottom still feels a bit undercooked, try baking the pizza directly on a preheated stone instead of using a baking sheet—it really helps concentrate the heat and gives you that perfect crisp.
When it comes to gear, investing around ₹1000-₹1500 in a pizza stone is totally worth it. But if you don’t want to spend that much, a heavy cast iron skillet or steel pan can do a great job too. They hold heat well and give you a much better crust compared to a flimsy baking tray.
Variations and Swaps
If you’re avoiding gluten, I’ve tried a few gluten-free flour blends. They don’t stretch like regular dough, so I usually make the crust a bit thicker or use parchment paper to move it without tearing.
Looking for a healthier twist? Whole wheat flour is great, though it makes the crust a bit heavier. I like mixing one and a half cups of whole wheat with the same amount of bread flour—it’s a nice balance between nutrition and texture.
Dairy-free? Vegan cheeses have come a long way. I often grab cashew-based cheeses from the store, or I go simple—pile on fresh veggies and drizzle some good olive oil for that lovely, rich flavor.
When it comes to toppings, the sky’s the limit! I’ve found that some of the best pizzas come from combining unexpected ingredients, so don’t be shy—experiment with whatever you’ve got on hand.
- Meat lovers: cooked chicken, pepperoni, Italian sausage, pancetta
- Vegetarians: grilled zucchini, eggplant, mushrooms, sun-dried tomatoes
- Adventurers: artichoke hearts, caramelized onions, fig slices, arugula
As for sauce, I love switching things up by replacing the usual tomato base with something different—basil pesto is a personal favorite, or sometimes I go for a creamy roasted garlic and olive oil sauce. Each one adds its own twist and keeps the pizza feeling fresh.
And don’t be afraid to toss in some spices or fresh herbs. A sprinkle of crushed red pepper or a few sprigs of fresh thyme can really wake up the flavors and give your pizza that little extra zing.
Best Ways to Serve and Enjoy Your Pizza
Nothing beats pulling a pizza right out of the oven and digging in while it’s still hot. The cheese is gooey, and the crust has that perfect crispiness you lose once it cools down. Trust me, waiting for it to sit just isn't worth it.
When it comes to sides, I like to keep things simple and fresh. A crisp green salad or some roasted veggies do a great job of balancing the richness of the pizza without stealing the spotlight. Plus, they’re easy to whip up and keep the meal feeling light.
- A crisp green salad with lemon vinaigrette cuts through the richness.
- Garlic bread or cheesy breadsticks are crowd-pleasers.
- Dipping sauces like chili oil, ranch, or garlic butter add extra flavor.
When it comes to drinks, you can’t go wrong with a classic cola, but for me, a cold craft beer or a crisp, chilled Pinot Grigio hits the spot much better. They cut through the pizza’s richness without overpowering the flavors.
Leftover pizza can be a bit of a gamble. My trick? Skip the microwave and pop the slices into a hot cast iron skillet for 3-4 minutes on medium heat. The cheese melts back to gooey perfection, and the crust gets that satisfying crunch again.
Mistakes to Watch Out For
I’ve learned the hard way that this dish comes with a few classic traps you’ll want to steer clear of.
One big lesson? Don’t go overboard with toppings. I used to be excited and pile everything on, but that just led to a soggy pizza that cooked unevenly. Less really is more here.
Another rookie mistake I made was rushing the dough or skipping the proofing stage altogether. I tried some quick recipes before, but the dough ended up tough or pretty bland. Waiting it out definitely makes all the difference.
Baking without the right temperature or slipping an unheated tray into the oven wrecks the crust’s texture. I learned this the hard way—my early attempts came out with pale, doughy bottoms because I skipped preheating. Lesson definitely learned!
Pouring on too much sauce or skimping on seasoning can really kill the flavor. Sauce needs just the right balance to bring everything alive. I’ve found that adjusting seasoning little by little makes a big difference.
And don’t even think about rushing the oven or stone preheat. You need at least 30 minutes of heat before baking. I once tried to hurry it, and it completely spoiled the crust—so trust me, patience here pays off.
Smart Tips for Storing Dough and Prepping Meals
If you have leftover dough, don’t let it go to waste. Just wrap each dough ball tightly in plastic wrap, pop them in a ziplock bag, and freeze. They’ll keep for up to a month that way. When you’re ready to use them, let the dough thaw slowly in the fridge overnight—this really helps keep the texture spot on.
Another trick I’ve picked up is freezing your assembled pizzas before baking. Wrap them snugly in plastic wrap, then cover with foil to avoid freezer burn. When you want a quick meal, take the pizza straight from the freezer to the oven—you’ll just need to add an extra 2-3 minutes to the bake time. It’s an easy way to have fresh pizza ready anytime.
If you’ve ever nuked leftover pizza in the microwave, you know how quickly it turns rubbery and soggy. To keep that crust crispy and the cheese gooey, I recommend reheating it in a pan or oven instead.
When I’m prepping meals, I like to make two batches of dough—one gets baked fresh, while the other goes straight into the fridge or freezer for later. And homemade sauce? It’s great stored in jars and stays good for about a week chilled.
Dietary Tips and Swap-Outs
If you're avoiding gluten, swapping regular flour for gluten-free blends works well, though your crust might turn out a bit different in texture. It’s not a deal-breaker, just something to keep in mind when you’re mixing and matching flours.
Going vegan? No problem. Skip the cheese and pile on fresh veggies and herbs, drizzled generously with good olive oil. Trust me, it’s surprisingly tasty and satisfying without any dairy.
Trying to keep things lighter? Cut back on the cheese, opt for a whole wheat or cauliflower crust, and go easy on the sauce. You’ll still get plenty of flavor without feeling weighed down.
If you’re avoiding allergens, there are simple swaps you can make—like skipping the nuts in your pesto, steering clear of seafood toppings, or trying out plant-based cheeses instead. It’s easy to customize without missing out on flavor.
FAQs
Wondering how long you should let pizza dough rise? About an hour to an hour and a half at room temperature usually does the trick—wait until the dough has roughly doubled in size before you move on.
Yes, you can definitely prepare pizza dough ahead of time. Just pop it in the fridge for a day or two, and the slow fermentation will actually add a richer flavor. It’s a handy trick for making busy nights a bit easier.
Don’t have a pizza stone? No worries! Just grab a heavy baking tray, a cast iron skillet, or a sturdy steel pan. Preheat it well, and you’ll get a nicely cooked pizza base that’s almost as good as stone-baked.
Want a crispy crust but don’t own a pizza oven? The trick is to crank your oven up to its highest setting and use a pizza stone or a heavy pan. This helps concentrate the heat right under the pizza, giving you that satisfying crunch.
Thinking of skipping homemade sauce? You can definitely use store-bought—it’s super convenient. But honestly, making your own sauce adds a fresh pop of flavor and a nicer texture that’s worth the extra effort.
Want to avoid burning your cheese or toppings? Keep your oven at a moderate temperature, add the cheese last so it melts perfectly on top, and don’t overload your pizza with too many toppings. Trust me, less is more when it comes to getting that golden, bubbly finish without the charred spots.
Thinking about using pre-shredded cheese? It’s definitely more convenient, but those little anti-caking agents in it can mess with how the cheese melts. Whenever I can, I grate my own mozzarella—it melts better and gives you that ooey-gooey texture that takes your pizza to the next level.
Conclusion
Making pizza from scratch has been one of my favorite kitchen adventures. This guide breaks everything down into simple, doable steps so anyone can give it a shot. After a few tries, playing around with dough and toppings feels less like a challenge and more like a weekly treat. Don’t hesitate to personalize the recipe, throw on your favorite ingredients, and embrace the mess—it’s part of the fun. If you like straightforward, tested tips instead of fancy buzzwords, this guide will help you step up your pizza game. Give it a go, tweak it to your liking, and enjoy every slice. And hey, when you nail it, drop a comment or share your pizza stories—I’m all ears!
If you’re hungry for more, subscribe to my newsletter where I share new cooking tips straight from my kitchen experiments. And don’t forget to follow me on social media—there, I drop extra tips and sneak peeks behind the scenes that you won’t want to miss.
Interested in this? You might enjoy my homemade bread recipes—they go perfectly with pizza nights. And if you’re looking for more pizza ideas, check out my post on the best topping combinations that I’ve tried and loved.
If this topic interests you, you may also find this useful: https://www.cravediary.com/blog/easy-homemade-tofu-step-by-step-guide-for-beginners