Getting Started with Making Tofu at Home
I’ll never forget the first time I tried making tofu in my own kitchen. Honestly, I thought it would be pretty straightforward, but I wasn’t entirely sure what to expect. After soaking soybeans for about 12 hours and carefully straining the fresh soy milk, I added the coagulant and waited anxiously. When those curds finally came together and I pressed them into a block, I was genuinely surprised. Homemade tofu wasn’t that bland, rubbery stuff you usually find at the store — it had a fresh, creamy texture with a subtle flavor that really made it feel homemade.
Tofu has become a favorite in lots of kitchens lately, especially for those focused on healthy eating or plant-based meals. And it makes sense — it’s affordable, packed with protein, and you can use it in so many ways. This guide is all about how to make tofu from scratch, sharing what I’ve learned from actually trying, testing recipes, and getting my hands messy in the kitchen. Whether you’re a curious home cook, a plant-based newbie, or just someone looking to mix things up, I’ll walk you through clear steps, share variations, and offer tips to make the whole process easy and even fun.
Why Making Your Own Tofu Makes a Difference
Homemade tofu is a whole different experience compared to the stuff you grab off the supermarket shelves. The biggest perk? Control. You get to decide exactly what goes into it, how fresh the ingredients are, and even the texture. Store-bought tofu often has preservatives and can sit for days, sometimes weeks, before you buy it. When you make it yourself, it’s just fresh soybeans and water — nothing extra. And on top of that, tofu packs a punch nutritionally: it's a great source of plant protein, calcium if you use the right coagulant, iron, and it’s low in fat.
I’ve always been intrigued by how tofu changes from dish to dish around the world. Think silky soft tofu in a Chinese hot pot versus the firm, grilled ones you find in Japan. It’s like tofu is a blank canvas that takes on flavors easily, but how it feels in your mouth matters just as much. After a few tries at making it, I learned how adjusting the pressing time and the type of coagulant can give me the exact firmness I want — something you rarely get with store-bought tofu.
What really drew me to homemade tofu, besides it being a solid source of protein, is how eco-friendly it is. Growing your own soybeans for tofu takes way less water and energy than making processed meats. Plus, skipping the plastic packaging feels like a small win for the planet. And honestly, making tofu from scratch gave me a chance to brush up on some nifty kitchen skills — grinding soaked beans, curdling the soy milk, pressing the curds — all parts of the process that made me appreciate tofu way more than I ever did before.
What You’ll Need
You don’t need a long list of fancy ingredients to make tofu at home. Just grab some dried soybeans, a coagulant like nigari (magnesium chloride), gypsum (calcium sulfate), or even lemon juice, and clean water. If you’re starting with about 500 grams of dried soybeans, soak them in roughly 2 liters of water. That usually ends up giving you between 1.5 to 2 kilograms of fresh tofu, which is plenty to experiment with.
If you can get your hands on organic dried soybeans, I definitely recommend it. They usually cost around ₹150-₹200 for 500 grams and tend to be fresher, which makes a noticeable difference. Nigari and gypsum, on the other hand, can be a bit harder to find. I usually look for them at Asian grocery stores or reliable online shops. Expect to pay about ₹200-300 for 100 grams, but don't worry — you only need a tiny amount for each batch. Lemon juice is the easiest coagulant to find, but just a heads up, it gives the tofu a softer texture and a slightly tangier taste.
Adding a pinch of sea salt or some fresh herbs after your tofu sets is an easy way to give it a little extra flavor and a nice little twist on texture. Precision matters here — my go-to is around 2.5 grams of nigari dissolved in 100 ml of warm water for each batch. Also, soak your soybeans for at least 8 to 12 hours so they plump up fully. Changing the water once or twice during soaking can help cut down on any bitterness, making your tofu taste cleaner and fresher.
Easy, Step-by-Step Cooking Guide
Soaking Soybeans
First things first: rinse 500g of dried soybeans and toss them into a big bowl filled with around 2 liters of cold water. Let them soak for at least 10 to 12 hours — overnight works perfectly. I like to change the water halfway through because it cuts down on that strong beany taste. When they’re done soaking, you’ll notice the beans have about doubled in size — that’s your cue that they’re ready for the next step.
Grinding and Cooking the Soy Milk
Now, you’ve got two routes to take here. Traditional soybean grinders are cool if you can get your hands on one, but since I don’t have that luxury at home, I usually go with my trusty high-speed blender. Drain the soaked beans, then blitz them with 1.5 liters of fresh water for a couple of minutes until you get a smooth mix. Pour this into a large pot or Dutch oven and bring it to a gentle boil over medium heat. Keep stirring now and then to stop it from sticking or burning — that usually takes about 15 minutes.
Straining Soy Milk
Once the soy milk has boiled, strain it through a nut milk bag or a fine muslin cloth into a clean pot or a large bowl. I usually do this in batches, gently squeezing the bag to get every drop without pushing too hard and letting the pulp slip through. That leftover pulp, called okara, is too good to waste — I save it for baking or throw it into stir-fries for some extra texture.
Gently Heating Soy Milk and Adding the Coagulant
Next, heat the strained soy milk to around 75-80°C (170-175°F) — I always use a kitchen thermometer here because this part really matters. Meanwhile, dissolve your coagulant; for example, I mix 2.5 grams of nigari in about 100 ml of warm water. Slowly pour that into the soy milk while stirring gently. Once it’s fully added, stop stirring and cover the pot. After about 10 to 15 minutes, you’ll notice the curds forming and the whey turning clear. I’ve learned over time that rushing this step can break the curds apart, so patience is key.
Shaping, Pressing, and Cooling Your Tofu
Once the curds are ready, I gently transfer them into a mold lined with cheesecloth. Then comes the pressing — I usually place about 3 to 5 kilograms of weight on top for anywhere between 15 and 30 minutes, depending on how firm I want the tofu. Honestly, I’ve improvised with everything from clean bricks wrapped in foil to heavy pans — as long as it’s flat and steady, it does the trick. After pressing, I carefully lift out the tofu and dunk it in cold water. This step helps it firm up and washes away any leftover coagulant.
Throughout the whole process, I kept track of the timing — from soaking the soybeans to pressing the curds. I found paying attention to the little things — like how firm the curds felt or how clear the whey was — really helped me fine-tune each batch to get the texture just right.
Tips and Tricks for Cooking Tofu
Picking the Right Coagulant for Texture
The type of coagulant you use really changes how your tofu turns out. Nigari gives it a cleaner, slightly firmer feel — great if you’re planning to stir-fry. Gypsum makes tofu creamier and softer, with a bit more calcium that helps it set nicely. Using lemon juice or vinegar results in a delicate, silken tofu, but it can add a slight tang to the flavor. My advice? Try out small batches with different coagulants until you find your perfect match.
Water Temperature
When adding the coagulant, it's really important to keep the soy milk around 75-80°C. If it’s too hot, the curds dry out and crumble; if it’s too cool, they just won’t set right. I like using a kitchen thermometer to be precise, but if you don’t have one, look for gentle steam rising — no fierce boiling. That’s the sweet spot.
Pressing to Firmness
How long and hard you press the tofu makes all the difference. For a silky, soft texture, a light press of about 10-15 minutes does the trick. Want something firm or extra-firm? Give it a longer press with more weight, up to 5 kilos, for around half an hour. At first, it’s a bit of guesswork, but after a couple of tries, you’ll get a feel for it just by touch.
Acting Fast When Coagulating
Once you add the coagulant, take your time and keep steady hands. Stir gently to combine everything, then just leave the pot be. If you start moving it around or stirring again, those delicate curds can break apart, and that’s the last thing you want.
How to Keep Bitterness and Off-Flavors at Bay
From my experience, rinsing the soaked beans well and changing the soaking water a few times really cuts down on that beany bitterness. Also, don’t bring the soy milk to a crazy boil — heating it too much tends to mess with the flavor, leaving behind an unpleasant taste. Gentle warmth is the way to go.
Different Types and Swaps
Coagulants: What Works and What Doesn’t
- Nigari (Magnesium Chloride): Clean flavor, firm texture, slightly more expensive.
- Gypsum (Calcium Sulfate): Creamier texture, adds calcium, widely used in Japan.
- Lemon Juice/Vinegar: Readily available, softer texture, tangy notes, less consistent setting.
Silken vs. Firm Tofu
Silken tofu is made with more water and a gentler coagulant process — no pressing involved. To get that silky texture, you use less coagulant and set the soy milk in a heatproof container without pressing. For firmer tofu, you push out more water by pressing it longer with heavier weights. Trust me, it’s all about finding the right balance for the texture you want.
Exploring Different Soybeans and Bean Blends
One fun thing I tried was mixing soybeans with chickpeas or mung beans to switch up the flavor and texture. It definitely gives a different twist — some blends come out nuttier or creamier than straight soy. Also, I noticed that using black soybeans instead of the usual yellow ones changes not just the taste but the color too, which can be pretty cool if you're about presentation. It’s a neat way to experiment if you're tired of the usual.
Alternatives to Traditional Coagulants
If you can’t find nigari or gypsum, lemon juice or white vinegar can do the job, though your tofu will turn out softer and with a slight tang. Just be careful with how much you use since these acids are much stronger and can change the texture more than traditional coagulants.
How to Serve Your Homemade Tofu
Classic Dishes
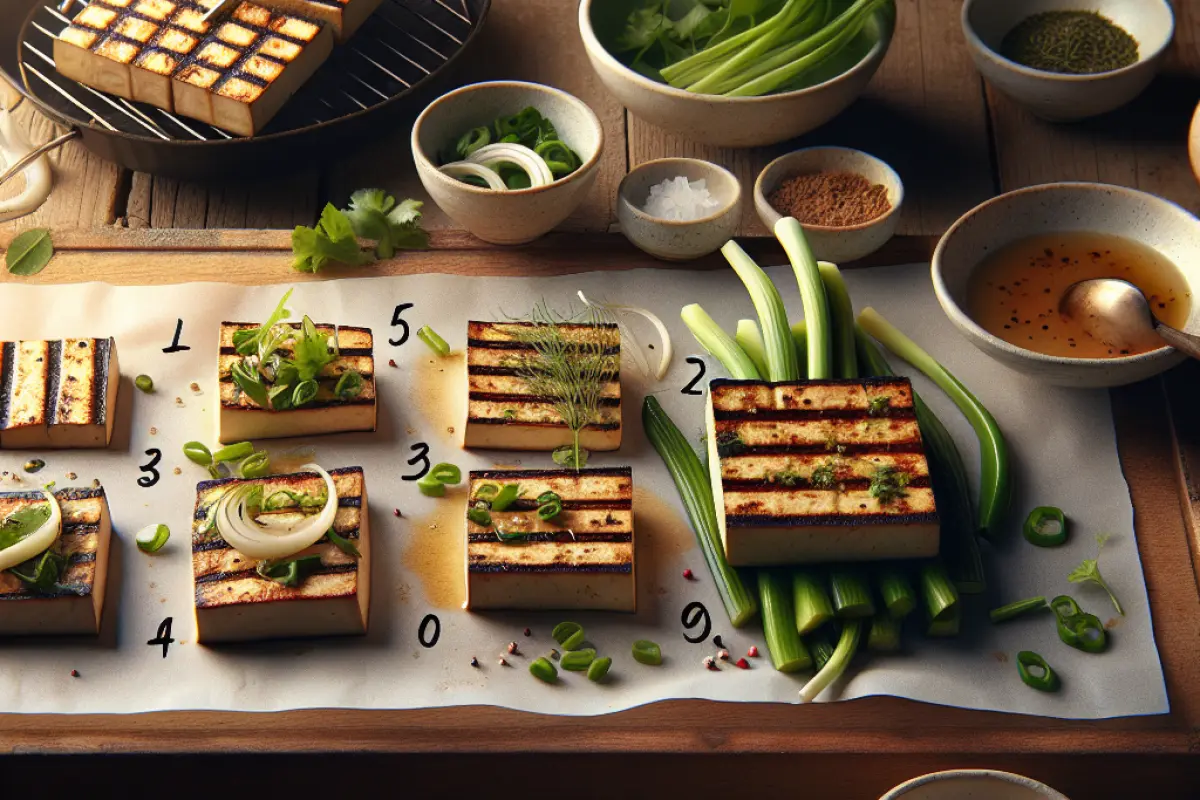
Homemade tofu is super versatile. I like tossing firm cubes into stir-fries with fresh veggies, slipping them into miso soup, or marinating and grilling them. One of my favorite quick fixes is pan-frying tofu with a splash of soy sauce and sesame oil — simple, flavorful, and always hits the spot.
Letting Fresh Tofu Shine
Sometimes the simplest approach works best. I like to drizzle fresh tofu with just a splash of light soy sauce, sprinkle on some chopped scallions, and add a few drops of toasted sesame oil. It’s amazing how these few ingredients bring out that smooth, creamy texture without overpowering it.
Enjoying Tofu with Local Veggies and Grains
Pairing tofu with seasonal veggies like steamed broccoli, carrots, or sautéed greens makes for a simple, satisfying meal. Throw in some cooked Basmati or brown rice, and you’ve got a plate that hits all the right notes.
Quick Tofu Salad
When you need a quick snack, try crumbling silken tofu with chopped cucumber, tomato, a pinch of salt, and a squeeze of lemon. It’s light, refreshing, and takes just minutes to whip up.
Mistakes to Watch Out For
Skipping the Soak Step
If you don’t soak the soybeans for at least 8 hours, they just won’t absorb enough water, which makes the soy milk thin and weak. I learned this the hard way when I was in a hurry once — ended up with tofu that was watery and disappointing.
Getting the Coagulant Amount Wrong
Using too much coagulant makes the curds chalky and crumbly, while too little leaves you with tofu that’s soft or just won’t set properly. I usually start with about 2.5 grams of nigari for every 500 grams of soybeans and tweak it a bit from there depending on how firm I want the tofu.
Pressing Errors
Pressing tofu is a balancing act. If you don’t press it enough, it stays mushy; press it too hard or for too long, and it dries out or even falls apart when cooking. I’ve been there — pressed mine way too long once, and it turned into a fragile mess in the pan.
Overheating Soy Milk
Boiling soy milk too aggressively can leave it bitter, which I learned the hard way. Now, I keep the heat at medium and stir regularly to prevent it from sticking or scorching at the bottom. It makes all the difference for a smooth, clean taste.
Patience Pays Off
Making tofu is all about patience and timing. I learned that the hard way when my first batch turned out lumpy and uneven because I hurried through the coagulation step. Letting the curds form slowly really makes a huge difference in texture and flavor.
Tips for Storing and Preparing Meals
Keeping Tofu Fresh Longer
To keep tofu fresh for up to 3-4 days, I store it submerged in clean water inside a sealed container in the fridge. Be sure to swap out the water every day — that little step keeps the tofu nice and moist, stopping it from drying out.
Freezing Tofu
Freezing homemade tofu actually changes its texture in a really handy way — it becomes chewier and a bit spongy, which works wonders in stews or stir-fries. I usually freeze extra batches in airtight bags and keep them for about a month, so I always have some on hand for quick meals.
Batch Cooking
I usually make around 2 kilograms of tofu at once. I keep a portion fresh in the fridge to use right away and freeze the rest. It’s a real time-saver later on, plus it means I always have a solid protein option ready when I’m short on time.
Best Time to Use
Since homemade tofu doesn’t have any preservatives, I’d recommend eating it within about four days if you keep it in the fridge.
Adjusting for Dietary Needs
Navigating Soy Allergies and Tasty Alternatives
If you're allergic to soy, tofu is obviously off the table. I've seen folks swap it out with chickpea or almond-based options, but keep in mind these alternatives need different cooking methods and don’t always behave the same in recipes.
Perfect for Vegan, Vegetarian, and Gluten-Free Diets
Homemade tofu works great for vegan, vegetarian, and gluten-free diets. It's packed with protein but low in fat, making it a really flexible ingredient to cook with.
Enhancing Flavor with Salt
A quick tip I picked up — sprinkle in a bit of sea salt or nutritional yeast to give your tofu a tasty little kick and some extra nutrients.
Adjusting for Dietary Needs
If you're watching your salt intake, skip adding salt while making the tofu and season it afterward when you serve it. And if you want a bit more calcium in your tofu, try using gypsum as your coagulant instead.
FAQs
Wondering how long homemade tofu keeps in the fridge? Usually, it stays fresh for about 3 to 5 days, so plan to enjoy it within that window for the best taste and texture.
Fresh tofu will keep for about three to four days if you store it fully submerged in water inside an airtight container. Just remember to swap out the water every day to keep it tasting fresh and to stop it from going sour.
Can I skip making soy milk from scratch and just use the store-bought kind?Store-bought soy milk usually has stabilizers that stop it from curdling, so it won’t set properly into tofu. If you want good results, making your own soy milk is the way to go.
What if my tofu doesn’t set right — what did I miss?Usually, it’s because the coagulant wasn’t measured properly, the soy milk wasn’t at the right temperature, or it just didn’t have enough time to firm up.
Do you really have to soak soybeans overnight every single time? Not always — sometimes a few hours is enough, depending on your beans and the recipe.
Leaving the beans to soak for at least 8 hours really makes a difference. It softens them up just right, which means you get a smoother soy milk with better flavor.
Wondering if you can make use of the leftover soy pulp, or okara, after making soy milk?Absolutely! Okara is packed with nutrients and works great in baking, soups, or mixed into veggie patties to add some extra texture and flavor.
Which coagulant should beginners start with when making tofu?Nigari is a great choice for beginners because it delivers reliable results and keeps the flavor clean and simple.
Looking to cut corners when making tofu at home? There are a few tricks you can try, but nothing beats taking your time for the best texture and taste.
You can blend soybeans straight away without soaking, but be ready for a stronger, slightly bitter taste and less milk yield.
Conclusion
Making tofu at home takes the mystery out of the process and lets you whip up fresh, wholesome plant-based meals exactly how you like them. It might take a few attempts to nail the texture and flavor, but fiddling with different coagulants and pressing times is part of the charm. Stick with it — patience and careful steps really pay off. If you enjoy getting hands-on in the kitchen and want full control over your ingredients, this guide will give you the confidence to make tofu at home.
If you're curious about this, you might also want to check out our guide on homemade plant-based proteins for everyday cooking. And for some tasty inspiration, take a look at our collection of tofu recipes that showcase homemade tofu in creative new ways.
If you’re into healthy eating, hit that subscribe button for more easy recipes and kitchen tips. This weekend, why not try making tofu at home? Snap a pic of your creation and share it on social media — I’d love to see how it turns out!
If this topic interests you, you may also find this useful: https://www.cravediary.com/blog/best-pasta-recipe-easy-delicious-authentic-guide