Introduction
I still clearly remember my first attempt at baking bread at home — it was a bit of a disaster, to be honest. Flour was everywhere, the dough stuck to my hands like glue, and I nervously watched, hoping it would rise at all. But after a few tries and many flour-covered counters, I finally landed on a recipe that’s easy to follow and bakes a loaf that’s truly satisfying. Baking bread can seem intimidating at first, right? But honestly, with the right recipe and a little patience, you don’t need fancy tools or a pantry full of ingredients to make something great. This guide is based on my own kitchen experiments and honest, practical advice, aiming to help food lovers and home cooks of any level whip up delicious bread without the stress. You’ll find clear steps and handy tips here to bring fresh, warm bread to your table.
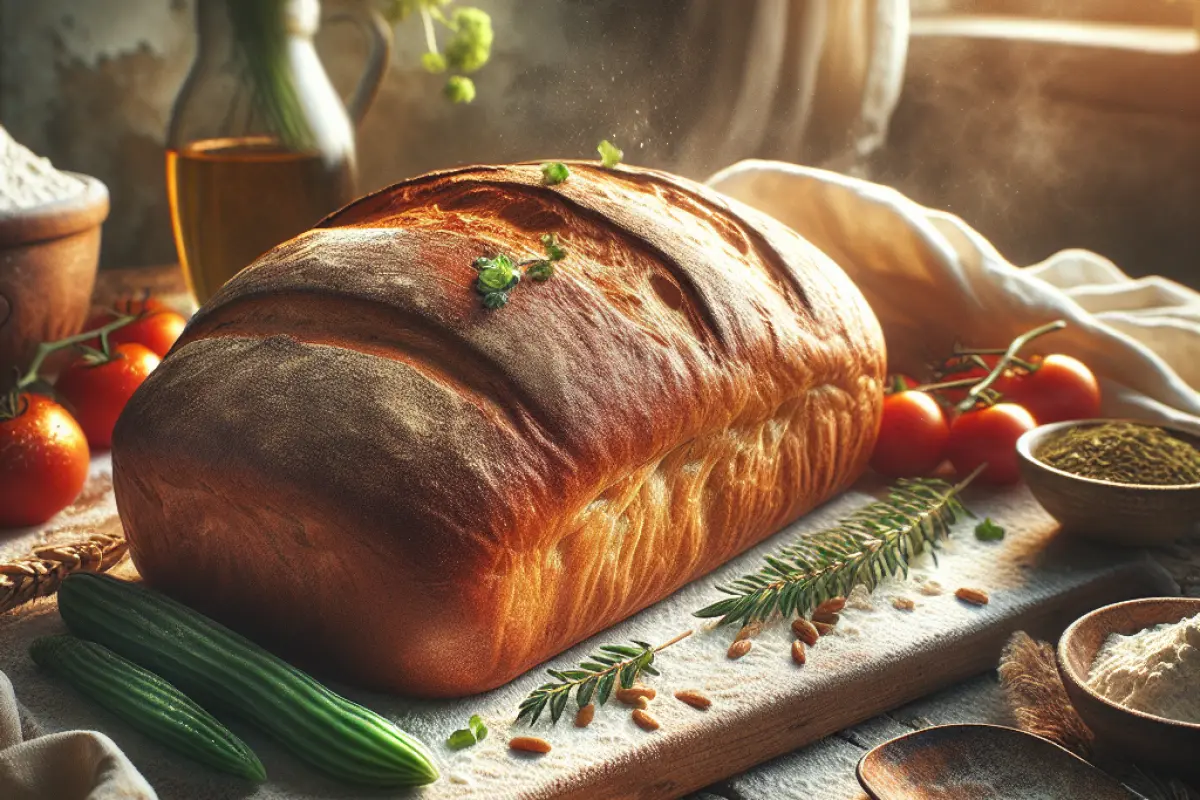
The Best Bread Recipe Made Simple
Bread is such a staple in kitchens everywhere. It’s more than just food — it’s the smell that fills the house, the comforting texture that makes every meal feel a little cozier. From crusty country loaves to soft, fluffy dinner rolls, bread comes in many forms, but many recipes call for long fermenting times or special flour blends. This recipe is different — it's straightforward and enjoyable to make, without demanding hours of your day. Over the years, I’ve tried plenty of bread recipes, and this one hits that perfect spot — the classic aroma, the soft crumb — without all the fuss. It’s simple enough that you can really enjoy the process, and the end result is something that feeds more than just your hunger.
What Makes This Bread Recipe Special
So, what makes this bread recipe stand out from the many I've tried? It’s the perfect mix of simple ingredients and a good rise without needing fancy equipment or odd ingredients. Just flour, yeast, salt, water, and a bit of patience. Unlike most store-bought loaves packed with preservatives and additives that kill flavor, this one gives you fresh bread with a crust that’s nicely crisp but not rock hard, and a crumb that’s soft yet holds its shape. I’ve tested this recipe multiple times, and it’s pretty forgiving — even for beginners. It’s not one of those no-knead styles where you toss everything together and forget about it; plan on about three hours including mixing, rising, and baking. So, don’t pull this out for a last-minute craving. It’s perfect for a relaxed weekend bake or a planned weeknight treat. The only trade-off? The crust won’t have that deep crunch you’d get from a brick oven, but honestly, that’s fine for baking at home. All things considered, it’s a reliable recipe that delivers consistently tasty bread.
Essential Ingredients You’ll Need
Before you get started, here’s a simple list of ingredients you’ll want to have ready.
- 3 cups (375g) bread flour or all-purpose flour (I prefer bread flour for structure)
- 1 ½ teaspoons (8g) salt (fine sea salt works well)
- 2 teaspoons (7g) active dry yeast or instant yeast
- 1 ¼ cups (300ml) warm water (around 38°C/100°F)
- 1 tablespoon (15ml) extra virgin olive oil or neutral oil (optional, helps with texture)
- 1 teaspoon (5ml) sugar or honey (helps yeast activation)
Let me break down why these ingredients matter: bread flour has more gluten, which helps the dough rise nicely. If you only have all-purpose flour, that’s totally fine — you’ll just end up with a softer texture. For the yeast, instant yeast saves you a step since you can mix it right in, but active dry yeast works just as well — you just need to proof it in warm water with a little sugar first. Picking good-quality flour and yeast, which usually costs between ₹150 and ₹300 depending on the brand, really makes a difference in the final loaf. Salt is key for balancing flavors and keeping the yeast in check, so don’t skip measuring it properly. Adding oil is optional but I like it because it keeps the bread moist and adds a bit of tenderness — perfect if you’re making sandwiches. I’ve also tried mixing in up to 20% whole wheat flour for a nuttier flavor, and that’s something I’ll talk more about later.
How to Make It: Step-by-Step Guide
Let me walk you through the bread-making process, step by step, so you can nail it every time.
- Proof the yeast (if using active dry yeast): In a small bowl, combine 1 ¼ cups warm water (38°C) with 1 teaspoon sugar/honey and sprinkle 2 teaspoons yeast over the surface. Let sit 5-10 minutes until frothy and bubbly. If you don’t see bubbles, your yeast might be inactive — best to start again.
- Mix dry ingredients: In a large bowl, whisk together 3 cups flour and 1 ½ teaspoons salt.
- Combine wet and dry: Pour the yeast mixture (or instantly add instant yeast dry) and 1 tablespoon oil into the flour. Stir with a wooden spoon until a shaggy dough forms.
- Knead the dough: Turn the dough onto a floured surface and knead for about 8-10 minutes until smooth and elastic. You can also use a stand mixer fitted with a dough hook; mix on medium speed for 6-8 minutes. The dough will be a bit sticky but manageable. If it’s too sticky, add small flour increments but avoid adding more than ¼ cup to prevent dryness.
- First proof: Transfer the dough to an oiled bowl, cover it with a clean kitchen towel or plastic wrap, and let it rise in a warm, draft-free spot for about 1 to 1.5 hours, or until doubled in size.
- Shape the dough: Punch down the risen dough gently to release air. Shape it into a tight loaf — I roll it into a 9-inch loaf shape or a round boule, depending on your pan.
- Second proof: Place the shaped dough into a greased 9x5-inch loaf pan or on a baking tray lined with parchment for a round loaf. Cover again and let rise for 30-45 minutes.
- Preheat oven to 220°C (425°F) about 20 minutes before baking. Place an oven-safe dish with water at the bottom of the oven for steam; this helps develop a crisp crust.
- Bake the bread for 25-30 minutes until golden brown and the internal temperature reaches about 90-95°C (195-205°F). Tap the bottom; it should sound hollow.
- Cool the bread on a wire rack for at least 20 minutes before slicing to let the crumb set properly.
A couple of quick tips if your dough isn’t quite cooperating: Make sure your water isn’t too hot or too cold — yeast can be a bit picky. And don’t rush the rising stage; giving the dough enough time to proof is crucial. If you notice the crust browning too quickly, just cover the loaf loosely with foil halfway through baking to keep things even.
Baking Tips and Tricks
A few simple kitchen tips can really make this recipe shine and help you get the best results.
- Ideal rising environment: Yeast loves warmth but hates drafts. I usually proof dough inside my oven with just the oven light on — it keeps it around 30°C consistently. If your kitchen’s cold, this simple trick saves waiting forever.
- Kneading: The goal is to develop gluten strands for elasticity. You don’t want to overdo it causing tough bread, but under-kneaded dough won’t rise well. I follow the windowpane test: stretch a small dough piece thin — if it holds without tearing, you’re good.
- Creating crust: Adding steam during the first 10 minutes of baking creates a crusty exterior, so placing a dish with hot water in the oven helps. Spraying water on the dough just before baking can also work but is messier.
- Shortcuts: If you’re tight on time, I found it’s possible to cut first proof to about 45 minutes. The bread will be more dense but still tasty. Also, a stand mixer with a dough hook saves effort and keeps your hands cleaner.
- Rookie mistakes: When I started, I smothered dough in flour during kneading, making loaves dry and crumbly. Trust the recipe measurements — adding too much flour is a trap many fall into. Also, don’t skip cooling; slicing hot bread leads to squished crumb.
Tweaks and Swaps
What I love about this bread recipe is just how adaptable it is — you can easily mix things up depending on what you have on hand or what flavors you’re craving.
- Flour substitutions: For a whole wheat version, swap ½ cup of the bread flour with whole wheat flour. The bread will be denser, greener in flavor, and a bit shorter in rise time. You might want to add an extra tablespoon of water to keep dough elasticity.
- Seeds and herbs: Adding 2 tablespoons of sesame seeds or poppy seeds into the dough or sprinkled on top before baking adds texture. Fresh or dried herbs like rosemary or thyme also pair beautifully for a savory loaf.
- Sweeteners: Honey instead of sugar imparts a mild floral note and softens crumb. Feel free to tweak sweetener type or quantity, but don’t skip it completely; yeast needs a bit of sugar to kick-start.
- Gluten-free and vegan: Gluten-free baking is tricky because texture depends on gluten strands. You can try gluten-free all-purpose blend (about ₹300-400 per kg) and xanthan gum (1 tsp per cup flour) but results vary. The oil can be swapped with vegan butter or coconut oil, and plant-based yeast works the same.
- Flatbread option: If you prefer quick bread, reduce yeast to 1 teaspoon, skip rising, and cook dough like pita on a hot griddle in 4-5 minutes. Not the same texture, but a step for busy nights.
How to Enjoy Your Fresh Bread
So, you’ve got your fresh loaf — now what’s the best way to enjoy it?- Sandwiches: Thick slices hold up well with classic fillings like cheese, tomatoes, and deli meats. I personally love it toasted with avocado smash and a fried egg.
- Breakfast toasts: A smear of unsalted butter and homemade jam is simple but rewarding. For extra indulgence, top it with ricotta and honey or peanut butter and banana slices.
- Accompanying soups and stews: This bread is sturdily soft enough to dunk into lentil stew or tomato basil soup without falling apart. It’s perfect for soaking up broths.
- Simple snacks: A slice with olive oil, crushed red pepper flakes, and a pinch of salt makes a satisfying snack or party appetizer.
From my experience, the simplest pairings often make the biggest impact. A few slices alongside some fresh, seasonal fruit or a small handful of nuts create a nicely balanced snack or light meal. And if you’re craving something heartier, try this bread with a warm, rustic vegetable stew — it’s like a cozy hug on a plate.
Avoid These Common Bread-Making Mistakes
Baking bread might seem simple, but there are a few easy mistakes that tend to sneak in and throw you off your game.
- Overproofing: Letting dough rise too long causes over-fermentation, which can make the bread collapse or taste sour. Watch the dough, don’t just time it.
- Adding too much flour: If the dough feels sticky, resist adding flour beyond ¼ cup. Over-floured dough yields dry, crumbly bread and denser crumb.
- Oven temperature errors: Too hot, and crust burns before the inside cooks; too cool, the bread won’t brown properly. Make sure your oven thermometer is accurate.
- Skipping cooling: Cutting bread hot leads to gummy, compressed crumb. Waiting 20-30 minutes feels hard, but it’s worth it.
- Rushing proofing stages: Proofing lets yeast activate and gluten relax. Shortchanging this affects rise and texture.
Keep in mind, I stumbled over many of these myself, so don’t sweat it if your first few loaves don’t turn out perfectly — it’s all part of the learning curve.
Tips for Storing Bread and Planning Meals
Fresh bread tastes best on the day it’s baked, no doubt about it. But if you don’t finish it all at once like me, here are a few tricks I’ve learned to keep it tasting decent a little longer without turning into a rock.
- Storage: Once cooled, wrap bread loosely in kitchen towels or paper bags and keep at room temperature for up to 2 days. Avoid plastic bags unless you want a soft crust; they trap moisture.
- Freezing: Slice leftover bread and freeze in zip-lock bags. You can thaw slices in minutes by toasting or leaving them on the counter for 15-20 minutes.
- Reheating: To revive slightly stale bread, sprinkle a few drops of water on the crust and warm it in a 180°C oven for 5-8 minutes. This refreshes moisture and crunch.
- Making ahead: If you want to prepare dough in advance, you can refrigerate after kneading for up to 24 hours and bake the next day. This slow fermentation improves flavor but requires an early start.
Adjusting for Dietary Needs and Preferences
This recipe is pretty flexible and can be adjusted easily to fit different dietary preferences or restrictions.
- Gluten sensitivity: Gluten-free baking is definitely a challenge here. While gluten-free flours and xanthan gum help, texture and rise won’t replicate this recipe exactly. Best to look for dedicated gluten-free bread recipes if you have celiac disease.
- Vegan versions: The recipe is naturally vegan if you avoid honey. Use maple syrup or sugar instead. Yeast proofing and baking remain the same.
- Low-sodium: You can reduce salt to 1 teaspoon if needed, but flavor will be milder and yeast may rise faster.
- Allergens: This bread is free from nuts, dairy, and eggs, making it suitable for many allergies. Just watch out for cross-contamination if you have severe allergies.
With a few simple changes here and there, you can enjoy homemade bread that suits your diet without losing its homemade charm.
FAQs
Wondering if you can make this bread without a mixer or by kneading just with your hands? Absolutely! Kneading by hand takes a little longer — about 8 to 10 minutes — but it’s totally doable. A strong wooden spoon can help get things started, but the texture really comes together best when you work the dough with your hands.
You can keep the bread fresh at room temperature for about two days if you wrap it in a kitchen towel or a paper bag. After that, it starts to go stale pretty quickly. If you want to hang onto it longer, freezing individual slices is your best bet — they’ll stay good for two to three months that way.
Using whole wheat flour instead of all-purpose is totally doable, but I wouldn’t swap it all out. Replacing up to half of the flour works great, though. Just keep in mind the bread will be a bit denser with a nuttier flavor. Also, you might need to add a tablespoon or two more water to keep the dough from drying out.
To check if your bread’s baked through, give the bottom a tap – it should sound hollow. If you have a food thermometer, stick it into the center of the loaf; it should read between 90-95°C (195-205°F) when it’s done. That’s a pretty reliable way to avoid under- or over-baking.
Can I freeze the dough instead of the baked bread? Absolutely! Once you've finished kneading, pop the dough into an airtight bag and freeze it — you can keep it that way for about a month. When you’re ready to bake, just thaw it overnight in the fridge, then let it proof and bake as usual. It’s a handy trick for those days when you want fresh bread but don’t want to start from scratch.
How do I make the crust softer or crunchier? If you like your bread with a soft crust, try brushing it with melted butter right after it comes out of the oven. It adds a nice, tender finish. On the other hand, if you’re craving that classic crunchy crust, bake it with steam (pop a pan of water in the oven) and resist the urge to cover it up once it’s done — that keeps the crust crisp and golden.
Is it okay to double the recipe for a larger batch? You can definitely double the recipe, but just know it'll take longer for the bigger dough to rise. Also, make sure you have a large enough loaf pan or some extra pans handy to fit the dough. It’s worth the wait, especially when you want more fresh bread for family or friends!
Conclusion
This bread recipe is about as straightforward as it gets — perfect whether you’re just starting out or have baked your fair share of loaves. It uses simple ingredients and clear directions, so you won’t feel overwhelmed or stuck halfway through. What I love is how dependable it is; you can count on good results every time. No fancy techniques or rare ingredients, just honest bread baking that fits into any schedule. Give it a whirl, tweak it to your taste, and enjoy the smell of fresh bread filling your kitchen.
Looking for more easy and quick meal ideas? Don’t forget to subscribe to the blog for the latest updates. And hey, if you’ve got your own bread baking tales or questions, drop them in the comments below! Or come hang out on my social channels where I share tips, pictures, and yes, the occasional kitchen mishap that somehow turned out okay.
If you’re curious to dive deeper, you might want to check out Classic Sourdough Starter for Beginners: How to Build and Maintain Your Own. Another favorite of mine is One-Pot Weeknight Dinners with Pantry Staples for Busy Cooks — both are great for keeping things simple without sacrificing flavor.
If this topic interests you, you may also find this useful: https://www. cravediary. com/blog/complete-guide-to-paratha-varieties-recipes-tips