Introduction
I can still picture that late afternoon heat settling in, and all I craved was a cold scoop of ice cream. The tricky part? I didn’t want to undo my efforts at eating healthier by grabbing the usual store-bought stuff filled with preservatives and artificial flavors. So, I rolled up my sleeves and started trying out homemade ice cream recipes that would satisfy my sweet tooth without the guilt. It took a few batches (and some taste-testing), but I finally nailed a recipe that balances wholesome ingredients with great flavor. Whether you’re a food lover, someone who enjoys cooking at home, or just after a creamy treat that’s a bit kinder on your diet, this guide has you covered with real tips on ingredients, techniques, variations, and storage—straight from my kitchen experiments.
Making the Best Ice Cream at Home
What is it about ice cream that almost everyone loves? It’s probably the smooth texture combined with that sweet flavor punch. But making a healthier version at home isn’t just about throwing ingredients in a bowl. You have to get the texture right, balance the sweetness, and think about fat content. Then there’s the classic debate—do you go for a custard base where you cook eggs and cream for a rich, creamy result, or stick with no-cook versions that mix yogurt or coconut milk with sweeteners before freezing? Both have their perks, and I’ve tried them all to figure out what works best without compromising on taste.
From my experience making ice cream at home, I can tell you it’s definitely worth the effort. You get to pick every ingredient, which means no weird chemicals or additives sneaking in like they do with store-bought versions. Plus, you can tweak the recipe to fit your dietary needs—whether you’re cutting back on sugar or trying to dodge certain allergens. The texture can take a little getting used to since homemade ice cream reacts differently to freezing and mixing than commercial ones. But after years of trial and error, I’ve picked up a few tricks that even longtime ice cream fans might not know about.
Why This Ice Cream Recipe Works
So, why spend time making ice cream at home, especially a healthier version? Well, most store-bought ice creams are packed with refined sugars, artificial stabilizers, and way more fat than you probably want. I get it—sometimes you just want to indulge without feeling guilty or crashing later. This recipe strikes that balance. It gives you that creamy, satisfying treat without all the extra stuff that can weigh you down. You get to enjoy your favorite sweet without the usual worries.
I’ve seen plenty of people wrestle with ice cream cravings because, honestly, it’s one of those treats that’s tough to replace. What’s great about making your own is that you can adjust things exactly how you like—cut the sugar, swap out dairy for almond or coconut milk, or toss in fresh fruit and nuts to give it a little health boost. This kind of flexibility is a game-changer if you’re trying to watch what you eat but still want to enjoy those simple dessert moments. It starts with a basic recipe, and from there, you can tweak it to be lower sugar, dairy-free, or packed with protein.
What You’ll Need
Here’s the basic lineup of ingredients I usually use for this one. Each one isn’t just about flavor or texture—they all add a bit of nutritional value too:
- 2 cups full-fat coconut milk (or 2 cups Greek yogurt for dairy lovers)
- 1/3 cup honey or pure maple syrup (you could also substitute with 1/4 cup stevia, but the texture changes)
- 1 tsp pure vanilla extract
- 1/4 tsp fine sea salt
- 3-4 cloves (about 1 tsp) cinnamon or ground nutmeg (optional, for added warmth)
- 1 cup fresh fruit puree (mango, berries, or banana works well)
- 1/2 cup dark chocolate chips or chopped nuts (optional)
For a 500ml batch, these amounts usually do the trick. I tend to go for organic coconut milk—it just tastes cleaner—and brands like Aroy-D or local organic options usually go for about ₹150-₹200 a can. The honey or maple syrup runs around ₹300 for a 250ml bottle, but it stretches quite a bit. If you’re watching your budget, local honey often costs less and tends to be fresher. Also, if allergies are a concern, keep an eye out for nut-free or gluten-free choices. And don’t skip on the vanilla extract—that’s the game-changer. Real vanilla extract costs roughly ₹250 for 50ml, but trust me, it’s worth every rupee compared to the fake stuff.
How to Make It: Step-by-Step
Let me guide you through the steps—I had to try a couple of times before I figured out the timing and order that really work.
- Preparation (15 minutes): Start by chilling your mixing bowl and utensils for at least 20 minutes. This helps later with freezing and texture. Meanwhile, mix the honey (or sweetener), vanilla extract, sea salt, and spices in a medium bowl.
- Base blending (10 minutes): If you’re using coconut milk, give the can a good shake, then pour 2 cups into a blender along with 1 cup of your fresh fruit puree. Blend until smooth. For Greek yogurt, you can skip blending the dairy, but blend with fruit separately for evenness.
- Mixing (5 minutes): Pour the blended mix into the pre-chilled bowl and stir in the sweetener and spices mixture thoroughly.
- Churning or Freezing (30-40 minutes): If you have an ice cream maker, churn according to manufacturer instructions, usually 25-30 minutes. I use a Cuisinart Ice Cream Maker that costs around ₹5000 and find it invaluable for softness. No ice cream maker? No problem—you can freeze the mixture in a shallow container, stirring vigorously every 15 minutes to break ice crystals, repeating 4-5 times over an hour.
- Final freezing (2-3 hours): After churning or stirring, let the ice cream firm up in the freezer for 2-3 hours.
From my early experiments, I realized that skipping the step of chilling the bowl made the ice cream turn out icier than I wanted. And if you stop the churning too soon, the texture ends up grainy instead of smooth and creamy. So, patience is key here—this recipe takes around 3 to 4 hours total, including freezing time, but most of that is just letting it do its thing.
Tips for Perfect Ice Cream
So, how do you get that silky, creamy ice cream everyone loves? After trying a bunch of times, I picked up a few simple but important tricks that really make a difference:
- Use full-fat coconut milk or Greek yogurt for creaminess. Low-fat options tend to get icy.
- Chill everything beforehand. I keep my mixing bowl and ice cream maker bowl in the fridge for at least 30 minutes before use—it really cuts down on ice crystals.
- Stir the base gently to incorporate air without deflating it, especially when churning.
- If using mix-ins like nuts or chocolate chips, add them in the last 5 minutes of churning or fold them in manually after the churn to avoid freezing too hard inside the ice cream.
- Don’t rush the freezing. Let the ice cream sit in the freezer for at least 2 hours before scooping. This helps the fats set and flavors mellow.
I’ve experimented quite a bit with the sweetness here. Using too much honey tends to overpower the subtle fruit flavors, so I usually start with about a quarter cup and then taste to see if it needs a bit more. The goal is to find that sweet spot—not bland, but not overly sweet either. And if you’re partial to spices like cinnamon or cardamom, try adding just a pinch to see how it brings out different layers of flavor.
Mix It Up: Variations and Swaps
What I really like about this recipe is how easy it is to tweak. Whether you want to switch up ingredients or try different flavors, it’s pretty forgiving and lets you make it your own without any stress.
- For dairy-free or vegan versions, switching to coconut milk or even cashew cream works well. Cashew cream can be made by blending 1 cup soaked cashews with 1/2 cup water—though it’s a bit pricier, about ₹150 for 100g cashews.
- You can lower sugar by using alternatives like stevia or monk fruit sweetener, but keep in mind it changes texture a bit, potentially making the ice cream less smooth.
- Swap fruit puree for different flavors: try 1 cup of strawberry puree, or 2 tbsp matcha powder blended into the base for a fresh twist.
- For nut allergies, avoid nuts and instead add toasted oats or seeds like chia or hemp for texture.
- Chocolate lovers can stir in 1/4 cup cocoa powder right into the base or fold in chopped 70% dark chocolate after churning.
One time, I experimented with lavender and honey in the mix. It added a subtle floral touch that was really nice, but you’ve got to be careful—about a teaspoon of dried lavender is just right to keep it from overtaking the flavor.
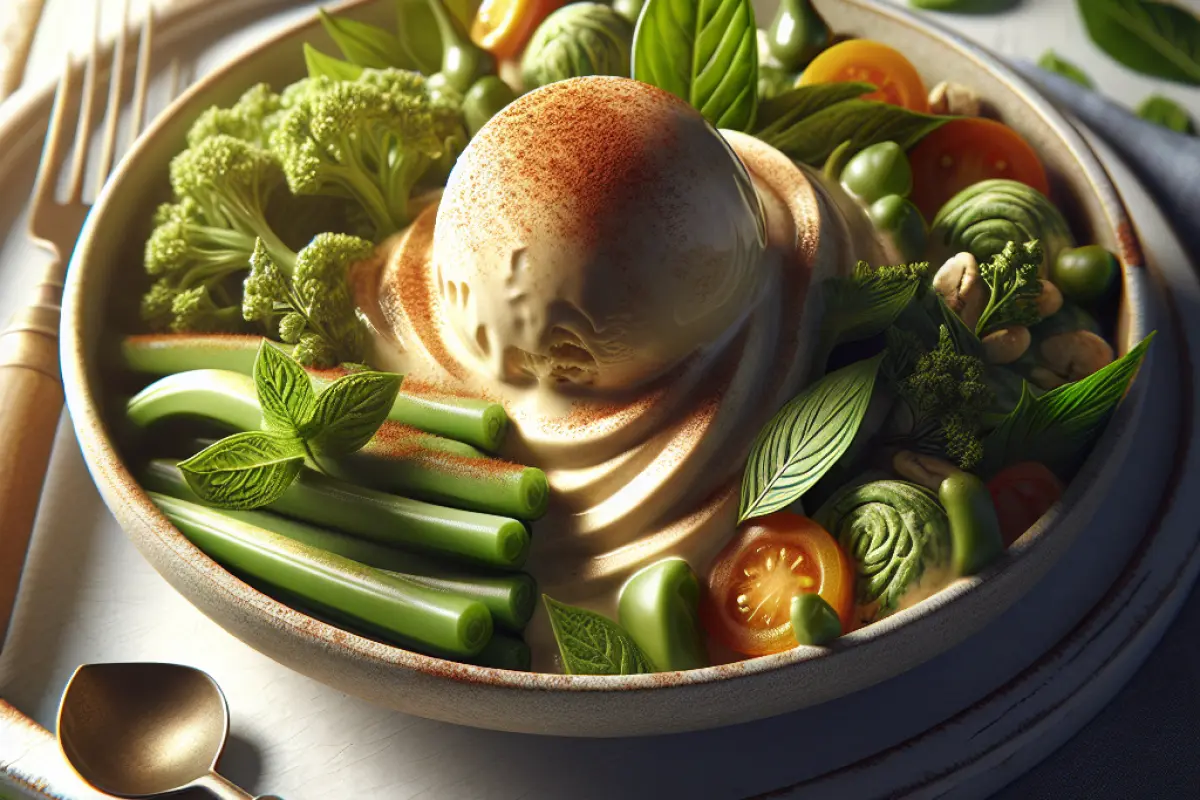
How to Serve and Pair Your Ice Cream
Once you’ve got the basic ice cream down, it opens up so many fun serving options. Here are a few of my favorite ways to plate it and the pairings I love to go with.
- Serve in simple bowls topped with fresh berries or a sprinkle of toasted almonds.
- For a fun twist, spoon into crispy waffle cones, which you can find at ₹100-150 per pack of six in local markets.
- Make parfaits layering the ice cream with granola and fruit compote in tall glasses. This is great for breakfast or brunch treats.
- Drizzle a homemade sauce—like a quick berry reduction or melted dark chocolate—for a special touch.
- Pair your ice cream with warm desserts like a slice of apple crisp or a spiced cake to contrast temperatures and textures.
Sometimes it’s the little things that make a dish memorable—a sprinkle of crushed nuts or just a pinch of flaky sea salt on top can take it from good to great with very little effort. And don’t underestimate how much the plating adds to the experience. Whether you serve it on a simple white plate or a rustic ceramic bowl, this recipe looks just right and welcomes compliments from anyone at your table.
Mistakes to Watch Out For
Trust me, I’ve stumbled plenty of times while perfecting this recipe. Here are the main pitfalls you’ll want to avoid to save yourself some headaches and get it just right on your first try:
- Oversweetening: It’s tempting to add too much honey or maple syrup. This can make the ice cream heavily sugary and impact texture. Start small and adjust after tasting the base.
- Improper freezing: Freezing too fast or skipping stirring steps on no-churn recipes leads to icy, hard lumps. Patience and occasional stirring are your friends here.
- Skipping chill times: Not pre-chilling your tools or the mixture often results in soggy consistency and slower freezing.
- Improper storage: Using open containers or those prone to freezer burn can cause off-flavors. I’ve lost batches simply because I didn’t seal containers tightly.
- Inconsistent stirring or churning: You need that uniform motion to break up ice crystals and incorporate air, especially without an ice cream maker.
After making this a few times, I can say it’s definitely worth splurging on a decent ice cream maker. It might set you back ₹4000-₹6000, but trust me, it cuts the hassle and makes the whole process way smoother.
Tips for Storage and Meal Prep
Homemade ice cream won’t last forever, but the good news is you can prep it in advance and store it properly to enjoy later without losing much of its charm.
- Store ice cream in airtight, freezer-safe containers—glass or BPA-free plastic works fine. I’d recommend containers with tight-sealing lids to prevent freezer burn and keep flavors intact.
- The best shelf life is about 2 weeks in the freezer. After that, you might notice texture changes and flavor dulling.
- To soften before serving, pull out the ice cream and let it sit at room temperature for 10-15 minutes.
- For parties, you can make the base one day in advance, chill overnight in the refrigerator, then churn or freeze the next day.
- Freezing smaller batches in 250ml portions helps avoid full thawing and refreezing later—a practice I avoid.
Follow these simple tips, and you’ll always have fresh-tasting ice cream ready to enjoy—no last-minute scrambling or complicated steps needed.
Adjusting for Dietary Needs
The great thing about this recipe is how easily it can be tweaked to fit various dietary requirements.
- For low-calorie versions, substitute half coconut milk with water or use low-fat Greek yogurt while boosting flavor with spices. I wouldn’t go below 1 cup full-fat dairy or coconut to keep the mouthfeel nice.
- Nut allergies? Skip nuts and replace with seed-based toppings or toasted oats. Make sure to check labels for cross-contamination if buying processed ingredients.
- For diabetics, use low-glycemic sweeteners such as stevia or erythritol but be aware these might alter texture and sometimes leave a bitter aftertaste.
- You can adjust fat content by using a combination of coconut milk and almond milk, but the less fat you use, the more icy it gets, so it’s a trade-off.
- To add nutrition, I’ve tried incorporating 1 tablespoon of chia seeds or a teaspoon of moringa leaf powder without affecting flavor much.
Always give your recipe a taste as you go and adjust it to fit your own flavor preferences and health goals. That way, it’s just right for you.
FAQs
Wondering if you can skip the ice cream maker? You definitely can! Just pour your mixture into a shallow container, pop it in the freezer, and stir it every 15 minutes or so for about an hour. This helps keep those pesky ice crystals from forming and keeps the texture smooth.
Homemade ice cream is best enjoyed within two weeks—after that, it tends to get icy and lose that creamy goodness. So, if you want that fresh, dreamy texture, aim to eat it up sooner rather than later.
If you’re wondering which natural sweetener works best here, I’d go with honey or pure maple syrup. They add just the right touch of sweetness without overpowering the flavor. Stevia’s an option, but it can mess with the texture a bit and sometimes leaves a slightly bitter aftertaste.
If your ice cream turns out icy or grainy after freezing, don’t worry—there are fixes! Try stirring it more often while it freezes to keep the texture smooth. Also, using a richer base like full-fat coconut milk or yogurt can make a big difference in creaminess.
Looking for a vegan way to get that creamy texture? I always reach for full-fat coconut milk or cashew cream—they give you that rich, smooth feel without any dairy. Trust me, they work wonders in any recipe.
Can I add alcohol or extract flavors to this recipe? Absolutely! Adding a splash of rum or a bit of vanilla extract can really boost the flavor. Just keep it light though—too much alcohol can mess with the freezing, making the ice cream less creamy and more icy.
Can I prepare the ice cream base ahead of time? For sure! Making the base the night before and letting it chill in the fridge actually gives the flavors time to settle, and it churns up just as smooth the next day. It’s a great time saver without any downside to texture.
Conclusion
Tackling a craving for ice cream with a healthier homemade version felt like a win right in my own kitchen. This recipe strikes a nice balance between great taste, creamy texture, and thoughtful ingredients you can tweak to your liking. If you're a home cook wanting to keep control over what’s in your dessert—without giving up the joy of ice cream—this one’s for you. It’s straightforward, reliable, and, honestly, a lot of fun to make. Give it a shot, make it your own, and enjoy every creamy spoonful!
If you’re curious about lighter summer treats, you might want to check out my post on sugar-free fruit sorbets that are perfect for warm days. And if you enjoy making desserts at home, I’ve also put together some easy tips for mastering frozen treats using simple ingredients you probably already have in your kitchen.
If this topic interests you, you may also find this useful: https://www.cravediary.com/blog/best-tofu-recipe-easy-delicious-and-healthy-guide